To soundproof a shed, you add mass to its walls, roof, and floor, decouple and damp those surfaces, and seal every air gap so sound can't leak through. Sheds are hard to soundproof because they're built light and full of gaps, so real results come from treating the whole envelope - walls, roof, floor, door, and windows - not just adding insulation.
This guide explains how soundproofing actually works, then walks through each part of the shed in order, with the materials that do the job.
Why Sheds Are Hard to Soundproof
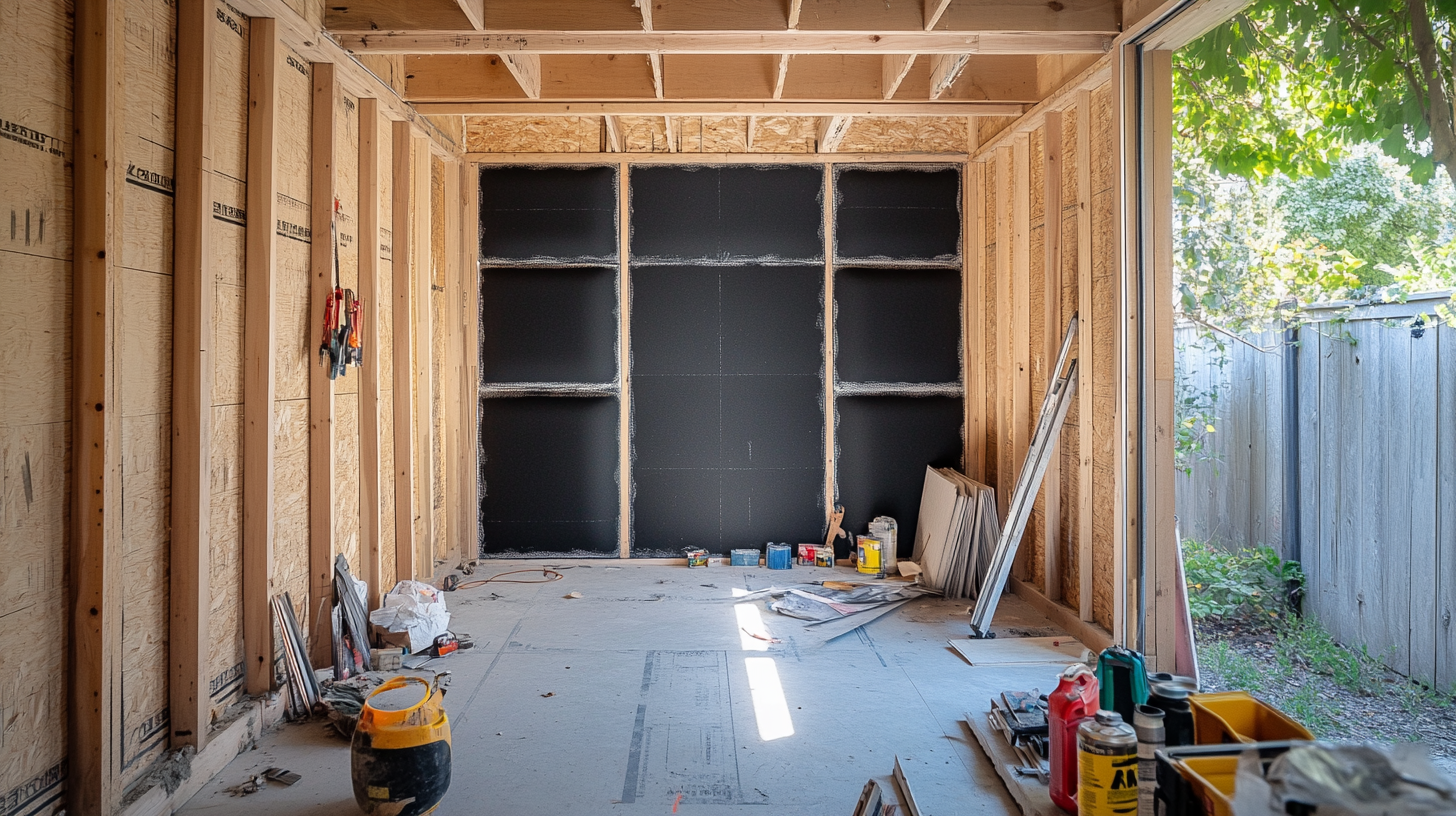
Sheds leak sound easily because they're built light, thin, and full of gaps. They were designed to store tools, not to contain or block noise, so their structure works against you from the start.
Most sheds have thin, single-layer walls with little mass, and mass is exactly what blocks airborne sound. A standard shed wall stops only a small fraction of the noise that a finished house wall would.
Sheds also have many gaps - around the door, windows, eaves, and where panels meet. Sound travels through any opening that air can pass through, so these gaps undermine everything else.
The roof and door are usually the weakest points. A lightweight roof and a hollow, loosely fitted door let large amounts of sound straight through unless they're addressed directly.
How Soundproofing Works - Mass, Decoupling, Damping, Sealing
Soundproofing works on four principles, and effective projects combine all of them rather than relying on any single product. Understanding these four makes every later step make sense.
Mass is added weight that resists sound energy. The heavier and denser a surface is, the less sound passes through it, which is why extra drywall and mass-loaded vinyl (MLV) are core materials.
Decoupling means separating the inner and outer surfaces so vibration can't travel directly across the structure. Isolation clips and a resilient channel break that path, stopping sound from passing through the framing itself.
Damping converts sound energy into a tiny amount of heat using a viscoelastic layer, such as Green Glue, sandwiched between two rigid panels. It is especially effective at reducing low-frequency and vibrational noise.
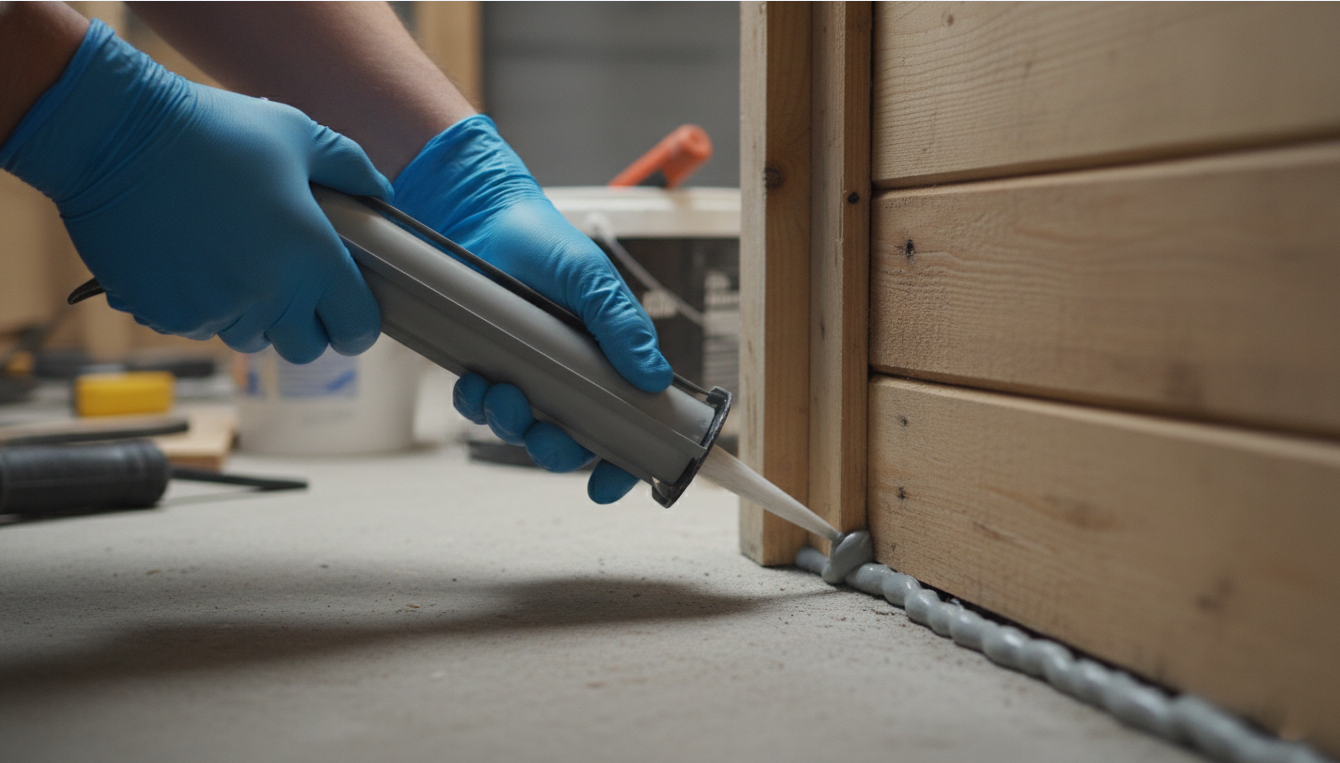
Sealing closes the air gaps that let sound bypass everything else. Acoustic sealant at every joint and seam is what turns good materials into an airtight, sound-resistant envelope.
Decide What You're Blocking First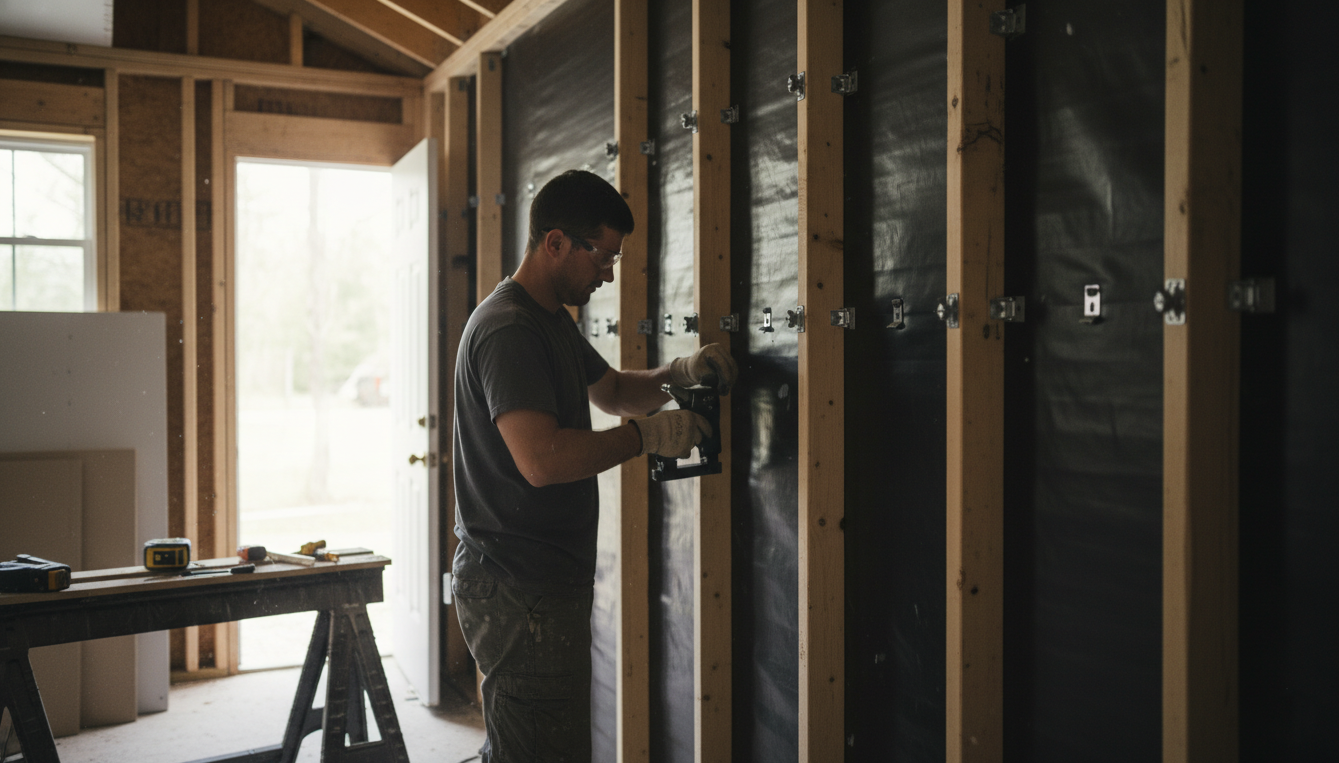
Before buying materials, decide whether you're keeping sound in or keeping sound out, because it changes where you focus. The physics is similar in both directions, but the priorities differ.
If you're containing loud sound from inside - a music studio, drum room, or workshop - you need maximum mass and decoupling on every surface, including the roof and floor. Loud internal noise escapes through the weakest part of the entire envelope.
If you're blocking outside noise from getting in - traffic, neighbors, or a busy street - focus on the side facing the source, as well as the door, windows, and any gaps. Outside noise is usually directional.
Also, separate airborne noise from impact noise. Voices and music are airborne and handled with mass and sealing, while footsteps and vibration are impact noise that needs decoupling and floor treatment.
Soundproof the Walls
Soundproof the walls by adding mass, damping it, and decoupling it from the frame. A single light shed wall has too little mass to block much sound on its own.
Add a layer of mass-loaded vinyl (MLV) to the wall, then cover it with drywall to build up blocking mass. Heavier walls stop substantially more airborne sound.
Apply a damping compound such as Green Glue between two layers of drywall. This sandwich reduces vibration passing through the panel, particularly at lower frequencies.
Decouple the new surface from the studs using isolation clips and channel where possible. This stops sound from traveling directly through the framing into the outer wall.
Fill the wall cavity with mineral wool or fiberglass insulation as a supporting step. Insulation alone doesn't block sound, but inside a sealed, mass-loaded wall, it absorbs energy in the cavity and adds a few points to the assembly.
Soundproof the Roof and Ceiling
Treat the roof and ceiling because, in a shed, these are often the largest sound leaks and the most overlooked. A light roof lets noise escape upward, and outside noise pours in.
Add mass overhead the same way as the walls, with MLV and drywall, so the ceiling isn't the weak surface that defeats your wall work. Loud sound always finds the lightest path out.
Build a decoupled ceiling on isolation clips and channel where headroom allows. Suspending the ceiling from the structure breaks the vibration path through the roof framing.
Insulate the roof cavity or rafter space and seal it fully. As with the walls, cavity insulation supports the mass layer rather than replacing it.
Soundproof the Floor
Soundproof the floor to stop sound from traveling through it and to control impact noise. Shed floors are often thin and sit close to the ground, transmitting vibration easily.
Lay an acoustic underlayment or a floating floor over the existing deck. This adds mass and decouples footsteps and equipment vibration from the structure.
Seal the joint where the walls meet the floor before finishing. This corner is a common hidden gap that lets sound flank around your wall treatment.
Add a dense rug or mat for an easy improvement in a music or practice space. It absorbs some impact energy and reduces reflections inside the room.
Soundproof Doors and Windows
Doors and windows are the weakest links in a shed, so they usually determine how soundproof the finished space is. The best wall in the world is undone by a hollow door or a rattling window.
Replace a hollow shed door with a solid-core or exterior door, because mass at the door matters as much as at the walls. A heavy door blocks far more sound than a light one.
Seal the door completely with perimeter weatherstripping, a door sweep or automatic bottom seal, and acoustic caulk under the threshold. The goal is an airtight seal all the way around when the door is closed.
Minimize and seal the windows, since glass is a weak point and openings are worse. Where a window stays, add a secondary pane or a removable acoustic insert, and ensure the frame seals tightly.
Seal Every Air Gap and What to Expect
Sealing every air gap is the step that makes everything else work, because if air can pass through, so can sound. This is the cheapest part of the job and the one most often skimped.
Run acoustic sealant along every seam, joint, and penetration - wall-to-floor, wall-to-ceiling, around outlets, and around the door and window frames. Even small unsealed gaps noticeably lower real-world performance.
Set realistic expectations about the result. A well-treated shed becomes dramatically quieter and suitable for music, work, or calls, but no affordable shed conversion is ever perfectly silent, especially against very loud or very low-frequency noise.
Budget according to the scope and who does the work. Commonly cited ranges put a DIY shed soundproofing project at roughly $500-$3,000 and a contractor job at roughly $1,000-$4,000, varying with shed size, materials, and how much of the envelope you treat.
Before You Start
Work the whole envelope in order - walls, roof, floor, then the door and windows - and apply all four principles together: add mass, decouple the surfaces, damp them, and seal every gap. Skipping any one surface or leaving gaps lets sound bypass the rest of your work.
Match the effort to your goal: containing a drum kit demands far more than quieting an office against street noise, and once the shed is sealed and soundproofed, absorptive panels inside finish the job by making the room sound clean.
Recent posts


