
We get it - not everyone wants to glue panels directly to their walls. Maybe you`re renting, maybe you like changing your setup, or maybe you just don`t want to risk damaging fresh paint. Whatever the reason, there are plenty of ways to install wall panels without adhesive and still get that clean, professional look you want.
At Sound Pro Solutions, we`ve worked with homeowners, office managers, and studio designers who need flexible solutions for mounting acoustic panels. Over the years, we`ve tested every possible installation method - from fully permanent to completely removable - and we`ve learned what truly works.
In this guide, we`ll share practical, easy-to-follow techniques for hanging panels without glue. You`ll learn when adhesive-free installation makes sense, and how to choose the right method for your type of space. Let`s get started.
Why Skip Adhesive?
There are plenty of reasons people want to avoid sticky solutions. And no, it`s not just about laziness - it`s about flexibility and care for your space.
Rental properties and lease restrictions
If you`re renting, you already know that landlords rarely like extra holes, glue residue, or wall modifications. Using easy-to-install wall panels that don`t rely on adhesive lets you improve your acoustics without risking your security deposit. You can remove everything when you move out - and your walls will look exactly the same as before.
Temporary acoustic treatment needs
Musicians, podcasters, and content creators often set up in temporary spaces. They need something that can go up quickly and come down just as fast. Adhesive-free setups make this process painless. When your studio or office changes, your panels can change with it.
Avoiding wall damage
Paint, drywall, or plaster can tear easily when you remove glued panels. Even strong double-sided adhesives can leave marks. That`s why people turn to non-adhesive wall panel installation methods - they`re cleaner and more forgiving, especially if you care about preserving your interior finishes.
Easy repositioning and removal
Maybe you want to experiment with panel placement for better sound performance. Or maybe your room layout changes often. Using hardware or clips allows you to adjust panel positions anytime without messy cleanup or wasted materials.
When adhesive is better
Let`s be fair - adhesives do have their place. For large-scale projects where panels must stay in place permanently (like theaters or conference rooms), adhesive can save time and cost. But for most homeowners and renters, flexibility wins every time.
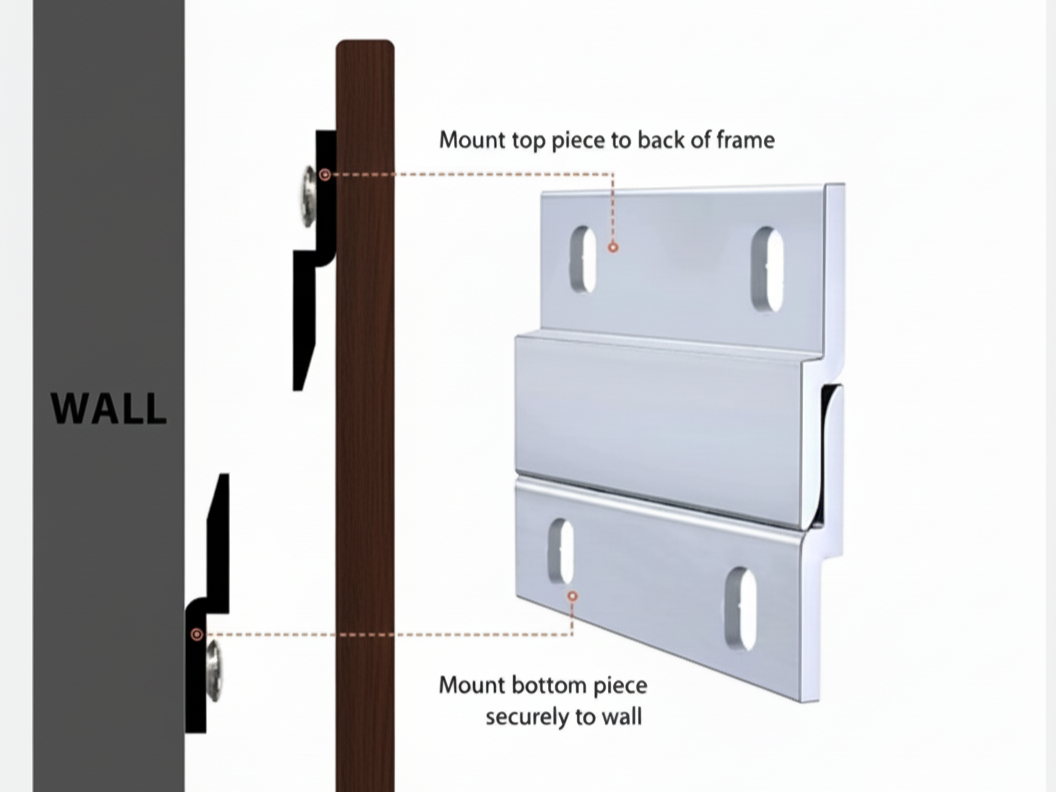
Method 1 - French Cleat System (Most Secure)
If you want something that feels sturdy and professional, the French cleat system is hard to beat. It`s a time-tested method used in carpentry and interior design for hanging heavy objects - including mirrors, cabinets, and acoustic panels.
What it is and how it works
A French cleat is basically two interlocking wooden or metal strips cut at an angle. One attaches to the wall, the other to the back of the panel. When you lift the panel and set it onto the wall-mounted piece, gravity locks the two parts together. It`s simple, solid, and easy to remove when needed.
Materials needed
You`ll need a pair of matching cleats - one for the wall and one for the panel - along with a few basic tools: screws, wall anchors, a level, and a measuring tape.
Step-by-step installation
- Attach one cleat to the top back edge of your panel.
- Mount the matching cleat on the wall, making sure it`s level.
- Hang the panel by aligning the two cleats and gently setting the panel in place.
- Test for stability.
Pros
It`s one of the most secure, easy-to-install wall panel methods you can use. The setup feels permanent, but is actually removable. The weight distribution is even, and the panel sits perfectly flush with the wall for a clean, professional look.
Cons
It does require some drilling and measuring. If your building restricts wall modifications entirely, this may not be an option.
Best for
Permanent setups that might need to be moved later - home studios, offices, or commercial acoustic projects.
Method 2 - Command Strips and Hook Systems (Easiest)
When people ask us how to install a wall panel without damaging paint, this is usually the first method we recommend. It`s simple, affordable, and doesn`t require tools.
Which products work for wall panels
Choose heavy-duty Command strips or removable hook-and-loop systems that are rated for the panel`s weight. Standard adhesive strips won`t hold thicker or denser acoustic materials, so always check the weight limit before mounting.
Weight limitations to consider
Most Command products can handle between 4 and 16 pounds per set. Lightweight foam or fabric panels are perfect candidates for this setup. Heavier fiberglass or wood-backed panels will need stronger support systems, such as French cleats or Z-clips.
Installation steps
- Clean the wall surface with isopropyl alcohol (not household cleaner).
- Apply the strips or hooks evenly across the back of your panel.
- Press the panel against the wall for 30 seconds to ensure full contact.
- Wait one hour before testing stability.
Pros
Completely damage-free, renter-friendly, and easy to remove. You can take the panels down in seconds and reuse the hardware if needed.
Cons
The weight limit is your biggest concern. Overloaded strips can fail over time, especially in humid environments. That said, for lightweight applications, they`re unbeatable.
Best for
Temporary setups, home studios, or office spaces where you want flexibility without tools or drilling.
Method 3 - Z-Clips and Mounting Hardware
For those who want a cleaner, more durable solution, Z-clips are an excellent alternative. They work on a similar principle as French cleats, but are thinner and more discreet.
Z-clips are small aluminum brackets that "lock" together when one side is mounted to the wall and the other to the panel. Once installed, the panel slides securely into place.
How Z-clips work
Each Z-clip set has a matching interlocking design. One side (the male) mounts to the back of the panel, and the other (the female) mounts to the wall. When the two slide together, they create a strong, hidden connection.
Installation process
- Mark the wall where the clips will attach.
- Screw the wall clips securely into studs or use drywall anchors.
- Attach the matching clips to the panel.
- Lift and slide the panel into place.
Pros
Z-clips are slim, reliable, and easy to remove. They give a floating look that`s perfect for modern interiors.
Cons
You`ll need to drill small pilot holes, so it`s not completely wall-safe for strict rental agreements.
Best for
Semi-permanent installations, like offices, studios, or showrooms, where aesthetics and stability both matter.
Method 4 - Stand and Frame Systems (No Wall Mounting)
Not every solution needs to touch the wall at all. For ultimate flexibility, freestanding panel systems are your best friend. These setups are becoming increasingly popular in offices, podcast studios, and open-plan environments where wall mounting simply isn`t an option.
Freestanding acoustic panel options
Freestanding frames or stands allow you to position panels wherever you need them - behind a desk, around a recording area, or even in the middle of a room to divide space. You can find single-panel stands or multi-panel frames that hold several acoustic panels at once.
At Sound Pro Solutions, we`ve supplied freestanding solutions for commercial clients who can`t modify their walls, as well as renters who need portability. You can move these setups whenever you like, and you`ll never have to worry about cleanup or damage.
When this makes sense
If you`re working in a rented office, temporary studio, or shared workspace, stands make perfect sense. They`re also ideal for people who like to experiment with different room acoustics. You can move panels around, test sound reflection, and adjust without tools or adhesives.
Pros
Zero wall damage. No holes, no glue, no commitment. The flexibility to move panels anytime is a huge benefit for creative spaces. Plus, they look professional and can be integrated easily into any design.
Cons
They take up floor space. For smaller rooms, this might be a drawback, but for open layouts or studios, it`s a fair trade-off.
Best for
Recording studios, coworking spaces, conference rooms, or temporary setups where flexibility and aesthetics matter as much as function.
Installation Tips for Easy Wall Panel Setup
Whether you`re using French cleats, Z-clips, or Command strips, a little preparation goes a long way. Proper installation doesn`t just make your panels look good - it helps them perform better acoustically, too.
Measure and mark before mounting
Always measure and plan before making any marks or drill holes. Even a half-inch mistake can throw off your alignment. For multiple panels, use painter`s tape to outline placement on the wall first. This gives you a visual guide before you commit to mounting.
Check weight ratings
Before you hang anything, double-check how much your mounting system can handle. Every easy-to-install wall panel solution has its limits. Overloading strips or clips is one of the most common reasons panels fall over time.
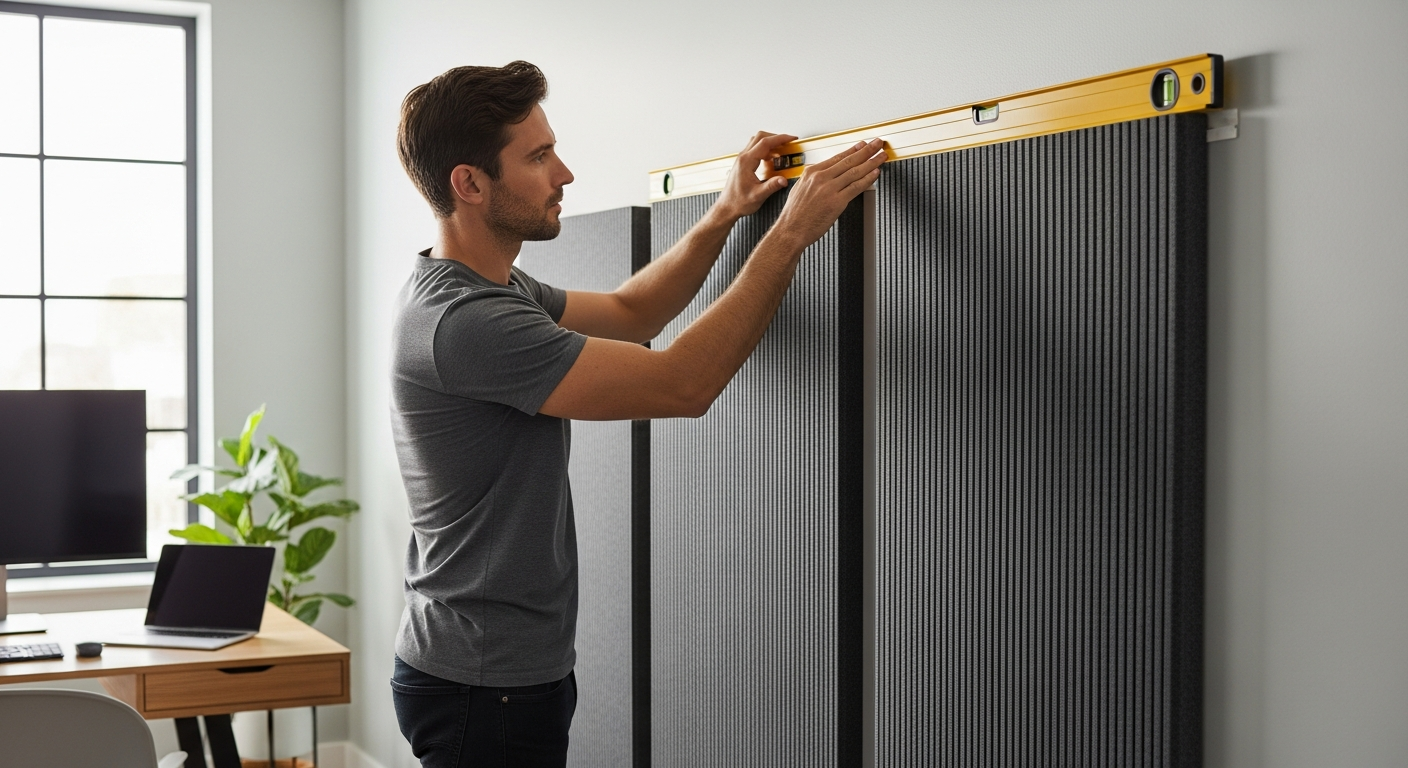
Use a level
Even small misalignments stand out. Using a level ensures your panels line up perfectly, especially when you`re installing several in a row. A clean, balanced installation gives your space that professional finish we always aim for at Sound Pro Solutions.
Plan panel placement for acoustic effectiveness
Mounting panels randomly won`t fix your acoustic issues. Identify first reflection points - spots where sound waves bounce off hard surfaces like walls, ceilings, or windows. Place panels strategically to absorb those reflections for maximum noise control.
Safety considerations
If you`re drilling or working with heavier panels, always wear safety glasses and gloves. Use proper wall anchors for drywall installations and never hang panels near electrical outlets or fixtures.
From the Acoustic Pros
So, can you install wall panels without adhesive? Absolutely - and often, it`s the smarter way to go. With options like French cleats, Command strips, Z-clips, and freestanding frames, you can find a solution that fits your space, budget, and long-term needs.
Adhesive-free installation means you can experiment, rearrange, or move your panels whenever you like. No damage, no stress, just flexibility.
At Sound Pro Solutions, we`ve spent years helping people design quieter, more comfortable environments - from small home offices to large recording studios. We supply professional-grade acoustic panels, mounting hardware, and soundproofing materials trusted across the U.S.
If you`re not sure which setup is right for you, reach out to our team. We`ll help you choose the best method, the right hardware, and the right acoustic solution for your specific space.
Because great sound isn`t just about silence - it`s about control, comfort, and confidence that your setup actually works.
Recent posts


