Garages are the go-to space for home recording. Big, separate from the house, and nobody complains about noise at 2 AM. For bands, producers, and podcasters who need more room than a bedroom closet, it's the obvious choice. But acoustically, a garage is the worst room you own. Concrete floors reflect everything. Thin walls leak sound both ways. And that garage door is a giant hole in your isolation. If you're planning a recording studio in garage space, the good news is every one of these problems has a fix. You don't need to demolish anything and start over. You need to address the right issues in the right order, starting with the ones that hurt the most.
Why Garages Sound So Bad And What Exactly You're Fixing
Concrete is the enemy. Your garage floor is a massive slab of hard, reflective surface that bounces every frequency right back into the room. Low end builds up fast. Vocals sound harsh and ringy. Clap once in an empty garage, and the problem announces itself.
Parallel walls with no insulation make everything worse. Sound bounces between flat surfaces in rapid succession, creating flutter echo and standing waves that color your recordings in ways no EQ can undo. Most garage recording studio ideas online skip this part. They jump straight to panels and foam. But until you understand the root problems, treatment is just guesswork.
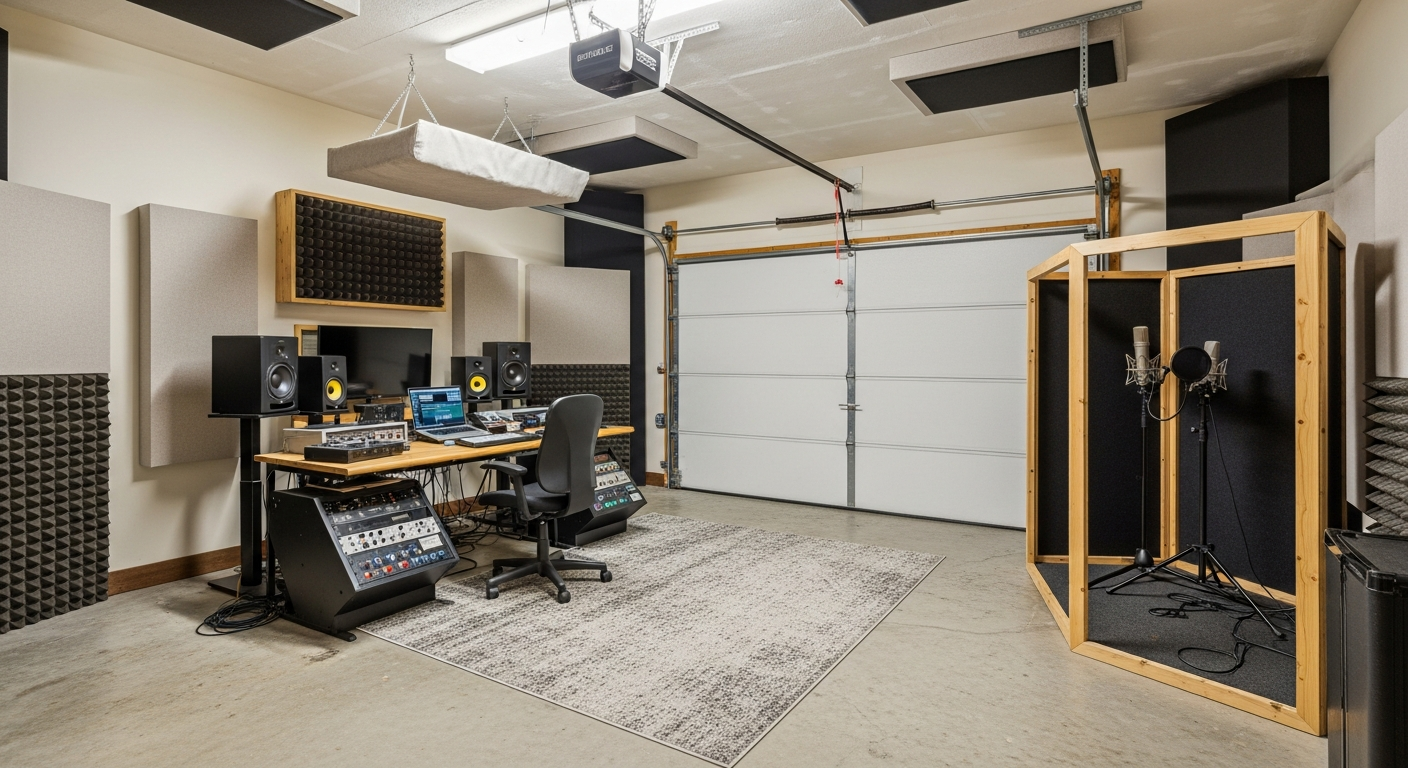
Add exposed rafters or open ceiling joists overhead, and you've got uncontrolled reflections from every direction. Then there's the garage door. Thin metal or wood panels with gaps along every edge. It's the single biggest source of sound leakage in and out of the space.
No climate control adds another layer. Temperature swings affect instruments, monitors, and your ability to work for more than thirty minutes. Humidity warps wood, corrodes strings, and changes how speakers respond. Any ventilation you add introduces mechanical noise that your microphone will gladly pick up. A room designed for cars has zero acoustic consideration built in.
The fix comes down to two parallel tasks. Converting a garage into a studio means isolating the space from outside noise first, then treating the acoustics inside. Every step in this guide follows that logic.
Start with the Biggest Leak — The Garage Door
The garage door is the elephant in the room. Thinnest, leakiest surface you have. No amount of panels on your walls will compensate for a door that lets traffic noise pour through.
Two approaches work.
Keep the door but improve it. Mount Mass Loaded Vinyl on the interior surface for added mass. Apply acoustic caulk along every seam. Add weatherstripping to all edges. This is reversible and budget-friendly. Expect a noticeable reduction, but not complete silence. Good enough for podcasting and moderate-volume tracking.
Or build over the opening entirely. Frame a stud wall across the doorway, fill it with mineral wool, sheath with drywall, and sandwich Green Glue between two layers. This turns a studio in garage conversion from a compromise into something serious. If you've stopped parking cars inside, this is the move that changes everything.
The side entry door matters just as much. Replace any hollow core with a solid core. Add door seals around the full perimeter and an automatic door bottom to close the gap underneath. No light visible under the door means no sound getting through either.
Windows, if your garage has them, need acrylic inserts with an air gap or removable plugs. Every opening you leave unaddressed is a leak that undermines the work you've done everywhere else. Seal these weak points first, and the rest of the project gets dramatically easier. Once the shell is tight, the real work begins inside.
Walls and Ceiling — Adding Mass and Killing Reflections
Two layers of work here. First, stop sound from passing through the structure. Then control what happens inside.
Sound Isolation Layer
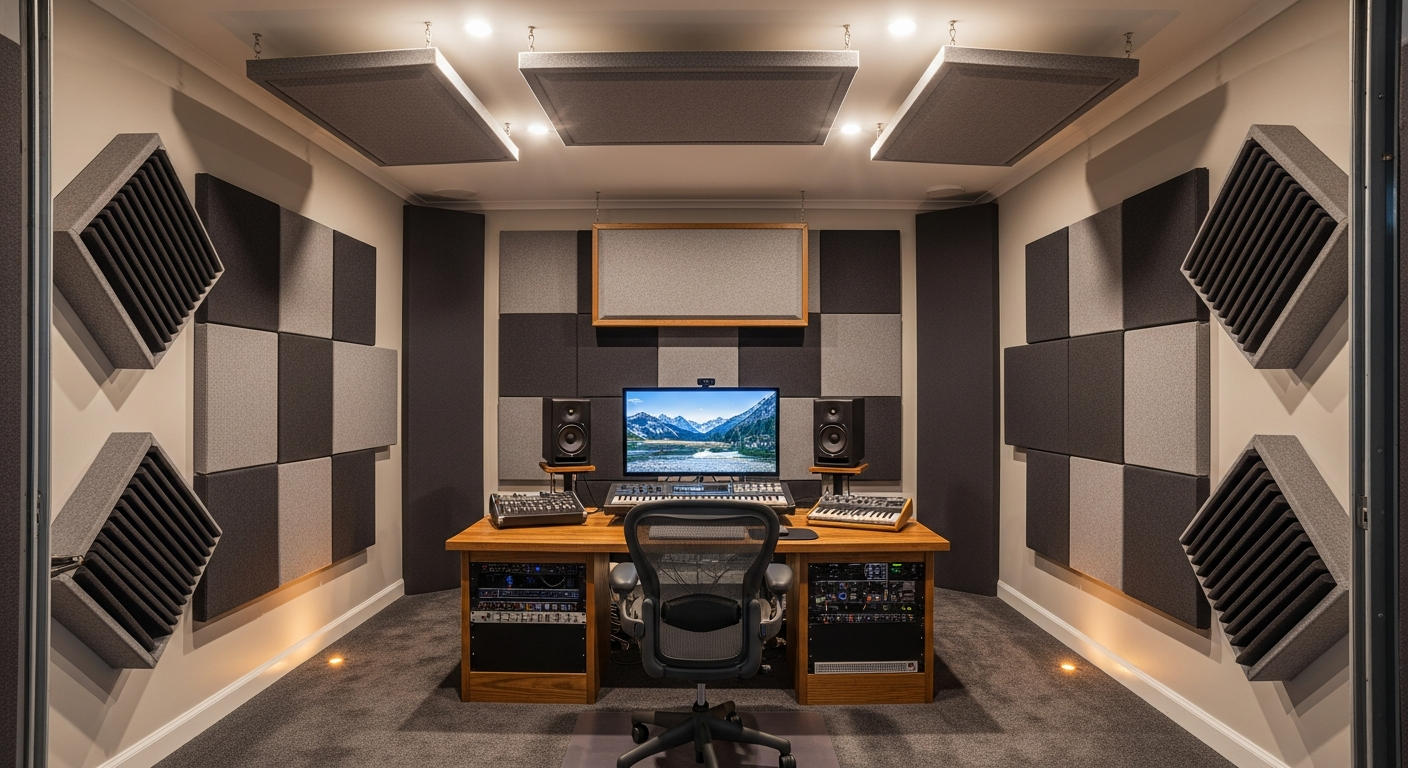
If your walls are bare studs or single-layer drywall, you have almost zero mass to stop sound. Install Resilmount isolation clips with hat channel across the studs. Hang new drywall on the hat channel with Green Glue between layers. Fill every stud cavity with mineral wool. This decouples the drywall from the framing so vibrations can't transfer through. The ceiling follows the same principle, especially if you have open rafters or exposed joists. Clip, channel, insulate, double drywall. Most garage music studio ideas that actually deliver results use this exact approach because nothing else matches it for the money.
If your walls already have drywall, skip the teardown. Add a second layer directly over the existing surface with Green Glue sandwiched between. Faster, cheaper, and still a significant upgrade.
Acoustic Treatment Layer
Isolation keeps outside noise out. Treatment controls what sound is inside. Separate problems, separate solutions.
Fabric-wrapped fiberglass panels are the foundation. Two-inch thickness on walls handles mid and high frequency reflections. Four-inch panels mounted diagonally across corners trap the bass energy that builds up in every small room. Cover 60 to 70 percent of the wall area. Not more. A dead room sounds lifeless. If you're figuring out how to convert a garage into a studio, this balance between coverage and liveness is the detail that separates a good room from a frustrating one.
Irregular panel shapes like hexagons and triangles scatter reflections in unpredictable directions. They break up the parallel surfaces that cause flutter echo. Combine a few with your rectangular panels for the best coverage.
The Concrete Floor Problem
Concrete is the most reflective surface in the garage. It sends everything back up into your microphones and monitors with almost no absorption.
The minimum fix: a thick rug with dense padding across the entire work area. This tames high-frequency reflections and kills footstep noise. Prioritize the zone around your microphone and monitor position if the budget is tight.
The serious fix: a floating floor. Lay sheets of plywood on rubber isolators over the concrete slab. This decouples the floor from the foundation and stops structural vibration from reaching your recordings. Truck rumble, footsteps from outside, and mechanical vibrations through the slab all drop significantly.
Ventilation and Climate Without the Noise
A garage with no airflow is an oven in July and a freezer in January. But standard HVAC and fans are noise sources.
A ductless mini-split is the best option. Quiet, efficient, no ductwork to rattle. Mount it high on a wall and it stays out of your recording chain. For air circulation, build sound-baffled ducts using an S-shaped path lined with absorbing material inside. Air passes through. Sound doesn't.
If noise from your HVAC is still audible on recordings, switch it off during takes and run it between sessions. Not ideal, but functional.
The Best Studio Is the One You Actually Use
Your garage won't become Abbey Road. It doesn't need to. The goal is a space where you can record, mix, and rehearse without fighting echo, street noise, and neighbor complaints. That doesn't require a professional budget. It requires the right fixes in the right places.
Start with the biggest problems. Seal the garage door. Close every gap. Throw a heavy rug on the concrete. Then add panels: corners and ceiling first, walls after. Each step produces audible improvement, and none of it has to happen in a single weekend.
Not sure how many panels your garage needs or what thickness works best? Reach out to Sound Pro Solutions. We'll help you calculate the right setup for your dimensions and goals. Browse the full product catalog or call +1-888-661-7233.
Recent posts


