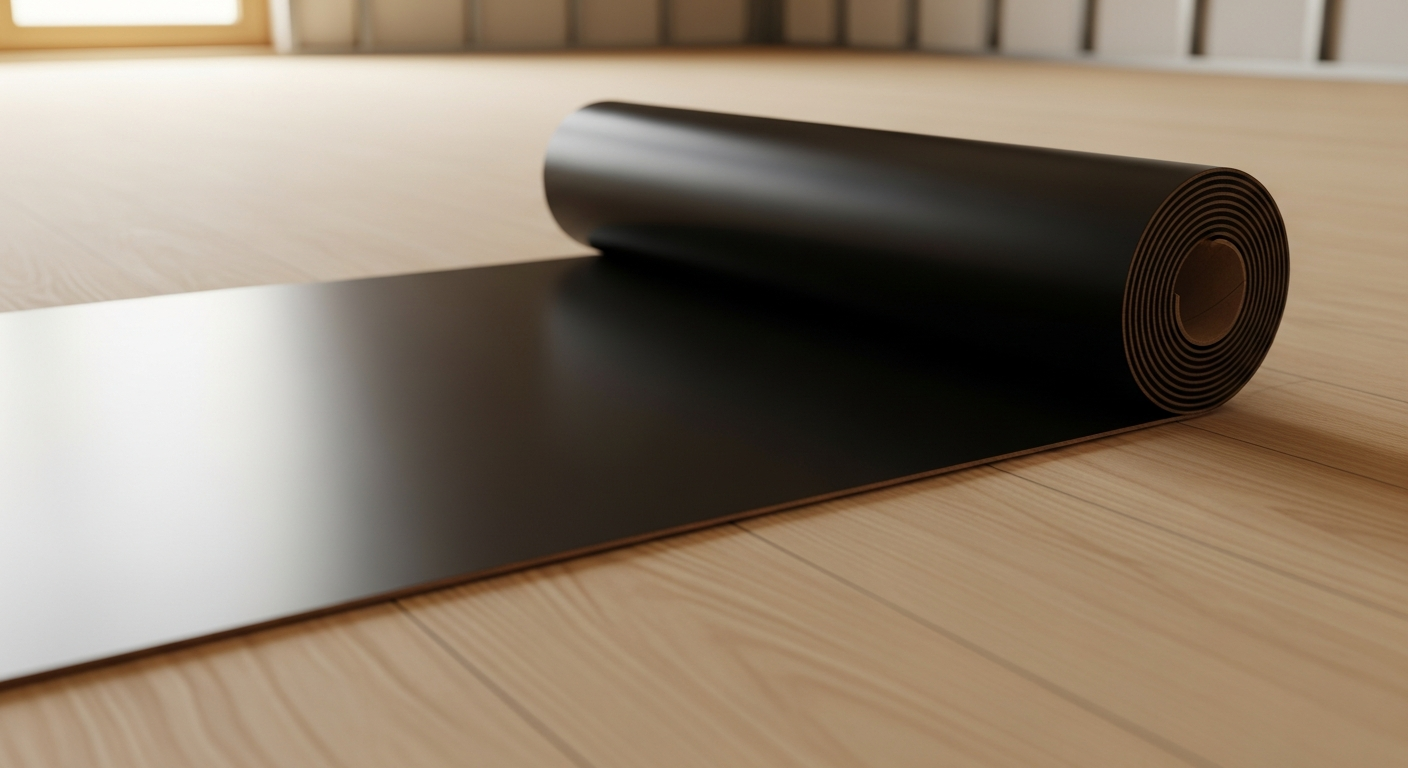
Mass-loaded vinyl, often called MLV, remains one of the most dependable materials for serious soundproofing projects. Homeowners use it for walls, ceilings, floors and even fences. Contractors rely on it for its density and flexibility. At Sound Pro Solutions, we often recommend MLV when clients need to block intrusive noise and create a calmer environment without making huge structural changes. It works incredibly well when you understand how to handle it, and it becomes even more effective when paired with the right acoustic treatments.
Installing MLV might seem intimidating at first because the rolls are heavy and the material has almost no stretch. The truth is that anyone who can measure, cut and secure a sheet of vinyl can install it with professional-level results. The process is methodical. Once you understand why each step matters, the confidence comes naturally and the results are far more rewarding.
Before you begin, take a moment to identify the type of noise you are dealing with. Airborne noise such as voices, TV sound or dog barking responds beautifully to MLV because of its high density. Impact noise, like footsteps or vibration, may require a combination of materials, but mass-loaded vinyl is still a major piece of the puzzle. The key is choosing the right installation method and making sure the surface is properly prepared.
Tools and Materials You Need Before Installing Mass-Loaded Vinyl
Before you unroll a single sheet of MLV, make sure you have every tool ready. Proper preparation doesn`t just save time. It prevents mistakes, reduces strain and helps you achieve the clean, professional finish you want. Below is a clear checklist of what you`ll need, along with quick notes on why each item matters.
Essential Tools and Materials
- Utility knife + spare blades
- Heavy straightedge or long metal ruler
- Tape measure
- Pencil or marker
- Chalk line
- Construction adhesive or acoustic caulk
- Mechanical fasteners (choose based on surface):
- Gloves
- Safety glasses (recommended)
- Respirator or mask
- Ladder or step stool
- A helper for larger areas
Preparing Your Workspace
Clear the entire work area before opening the roll. Mass-loaded vinyl is heavier than it looks, and navigating tight spaces with large flexible sheets is challenging. Make sure your workspace is ,well-lit free of obstacles, swept clean, and spacious enough to move and maneuver 4-8-foot sections of MLV without struggling.
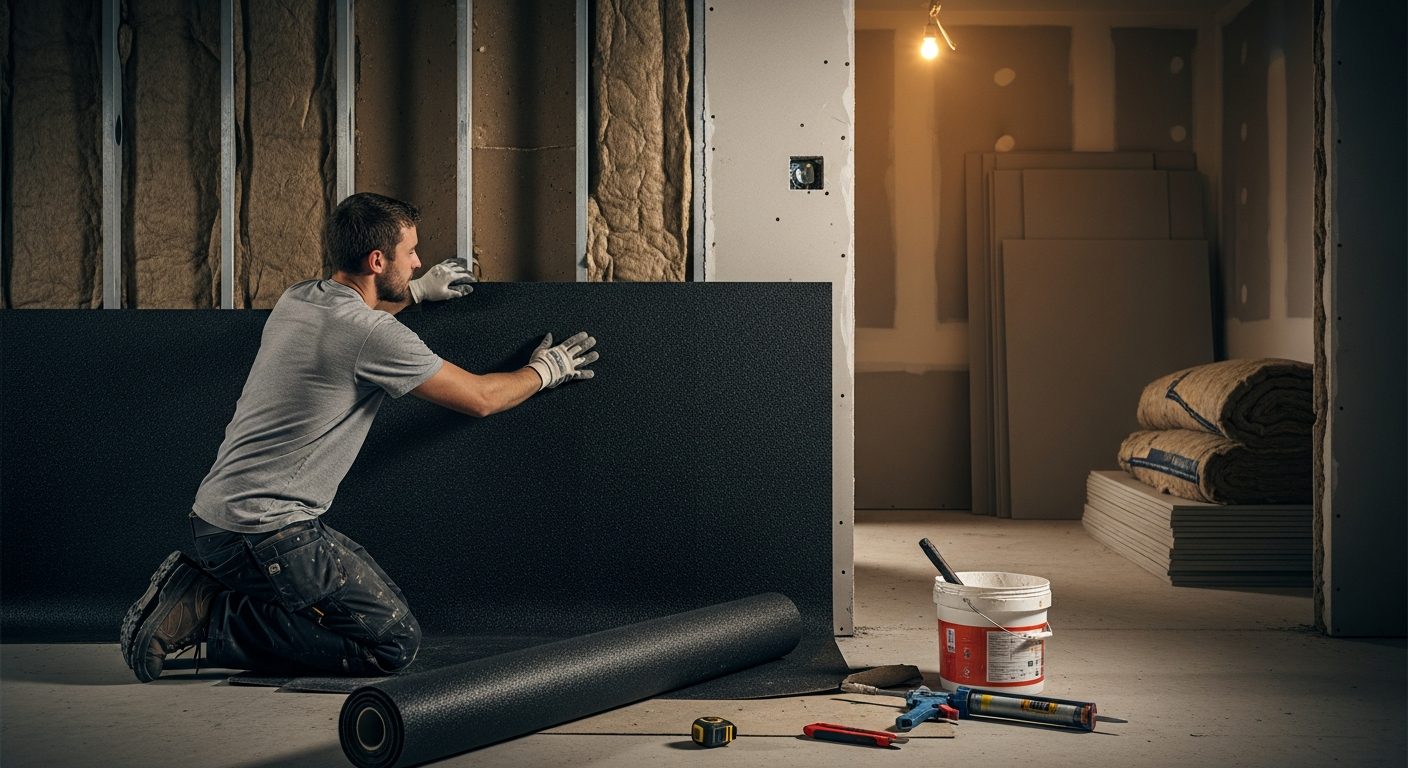
How to Install Mass-Loaded Vinyl on Existing Walls
Installing MLV on existing walls is one of the most common soundproofing projects. Many customers need quieter bedrooms, more privacy for home offices or reduced noise transfer between floors and hallways. Existing drywall can stay exactly where it is. You`re simply adding mass, and that is what makes mass-loaded vinyl so effective.
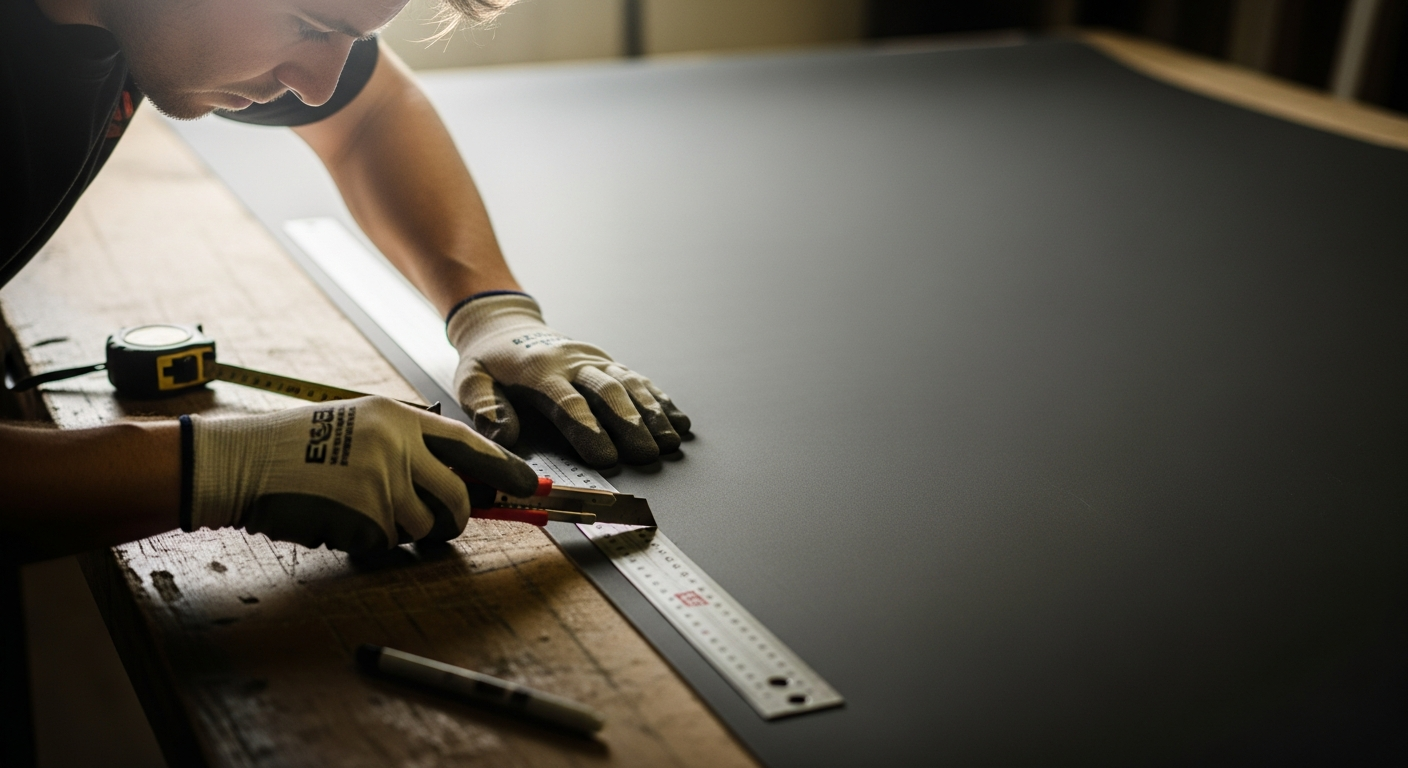
Step 1 - Measure the Wall and Pre-Cut the Pieces
Measure twice before making your cuts. MLV is heavy, and wrestling with oversized pieces wastes time and energy. Pre-cutting your sheets while the material is on the floor makes the process easier. Leave some extra length at the top and bottom so you can trim precisely once it`s mounted.
Step 2 - Prepare the Surface
Wipe away dust, loose paint and anything that prevents good adhesion. Small imperfections aren`t a problem, but you want a surface that allows the vinyl to sit flat. If there are outlets or switches, remove the covers. You`ll cut around them later.
Step 3 - Apply Adhesive or Acoustic Sealant
Run beads of acoustic sealant or construction adhesive across the wall in vertical or horizontal lines. You don`t need a perfect grid. You simply need enough bonding points so the vinyl stays snug while you fasten it. Acoustic sealant also helps eliminate small air gaps that reduce performance.
Step 4 - Position and Secure the MLV
Start at the top of the wall. Anchor the top edge with screws and washers or staples. Work downward slowly while pressing the material into the adhesive. The vinyl is not supposed to stretch, so don`t pull aggressively. Let it fall into place naturally. Smooth it out with your hands to avoid ripples.
Step 5 - Overlap or Butt the Seams
You can overlap pieces by an inch or butt seams tightly together. For best results, seal every seam with acoustic caulk. This step matters more than people think because even the smallest gaps can leak sound.
Step 6 - Trim and Finish
Trim edges with a sharp blade. Reinstall outlet covers. At this point, most homeowners add a new layer of drywall on top for a clean finish. The combination of MLV plus an extra layer of drywall delivers outstanding sound reduction and makes the wall look seamless.
You now have a fully functional sound-blocking barrier. And as long as you sealed the seams, your MLV installation will perform with maximum efficiency without needing constant maintenance.
How to Install Mass-Loaded Vinyl on the Ceiling
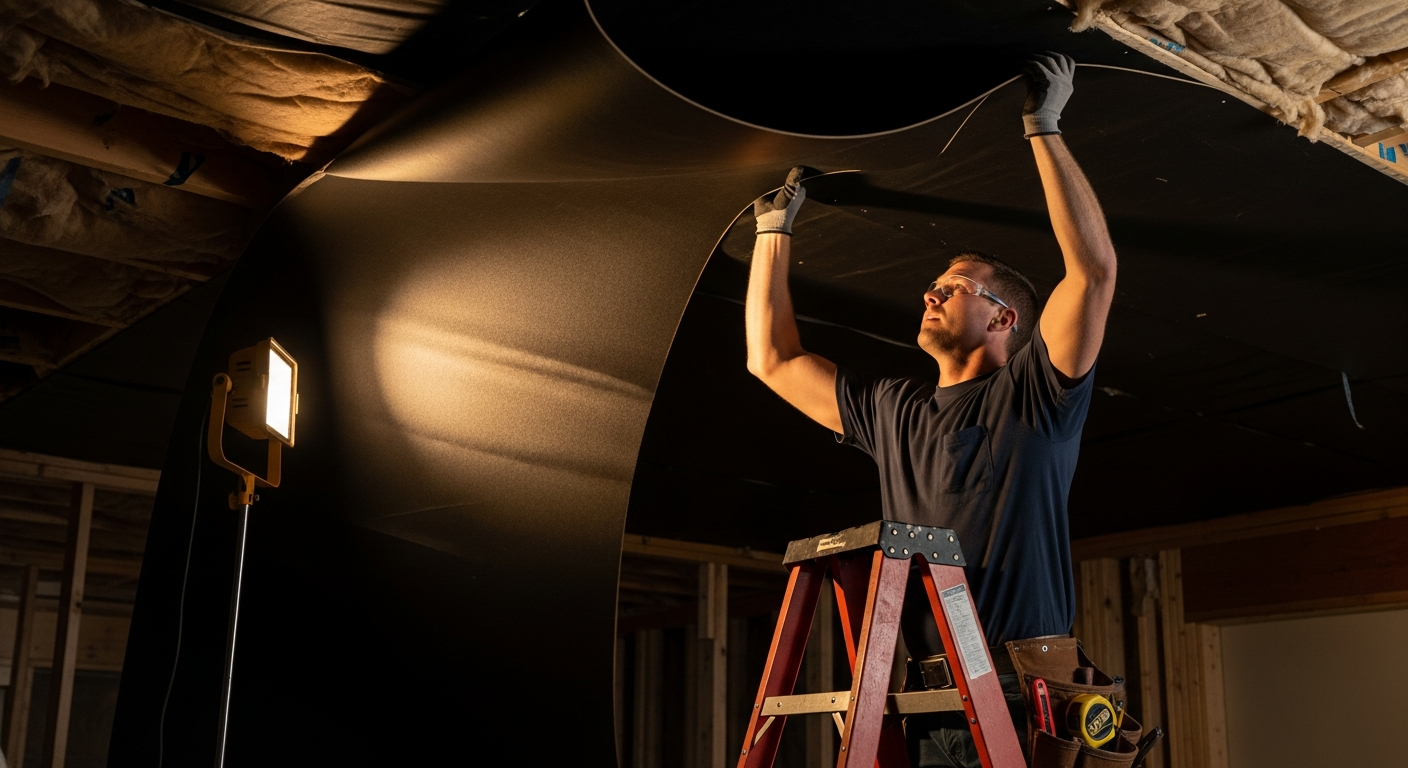
Working overhead is more challenging, so take your time. Ceilings transmit sound easily, especially footsteps and airborne noise from upper floors. Mass-loaded vinyl creates a dense layer that absorbs and blocks sound before it reaches your living space. Many Sound Pro Solutions customers install it under existing drywall when converting basements, building home studios or reinforcing old construction.
Step 1 - Prepare Your Work Area
Clear the room. A stepladder should sit on even flooring so you can move safely. Most people forget how awkward full sheets of MLV become once you lift them above your head. Pre-cutting pieces on the floor makes handling much safer.
Step 2 - Locate Joists and Plan Your Fastening Points
Find ceiling joists with a stud finder. Mark them lightly. You`ll use these locations for secure mechanical fastening because adhesive alone won`t hold the weight of MLV long term on a ceiling.
Step 3 - Apply Adhesive in Wide Patterns
Apply construction adhesive or acoustic caulk in generous swirls or zigzags. Don`t try to cover every square inch. The goal is simply to prevent sagging before you attach fasteners. Adhesive is your temporary helper.
Step 4 - Lift and Position the MLV Sheet
With help from another person, raise the vinyl sheet and press it firmly against the ceiling. Start securing it along the joists as soon as possible. Roofing nails or screws with washers work exceptionally well on ceilings because they spread pressure evenly.
Step 5 - Seal the Seams and Gaps
Just like with walls, sealing seams is essential. Use acoustic sealant to close every joint. MLV must act like one continuous barrier so that sound can`t slip through the intersections.
Step 6 - Add a Finishing Layer
Many homeowners install a second layer of drywall or a sound-rated panel afterward. This not only hides the vinyl but adds additional mass. The result is a stronger and cleaner acoustic barrier that significantly improves comfort in the room below.
The ceiling installation process demands patience, yet the payoff is dramatic. Once the material is in place, the difference in noise transfer becomes obvious almost immediately.
How to Install Mass-Loaded Vinyl on the Floor
Floors require a slightly different approach because you`re dealing with impact noise, vibration and foot traffic. Mass-loaded vinyl works beautifully as an underlayment when installed correctly. It dampens sound energy that travels through floor structures. This is especially important in multi-story homes, apartment conversions and any room where impact noise becomes distracting.
Step 1 - Clean and Level the Subfloor
Vacuum dust, debris and anything that might puncture the vinyl. A level, smooth surface allows the MLV to sit flat without wrinkles. Remove protruding nails or screws because bumps can damage the material over time.
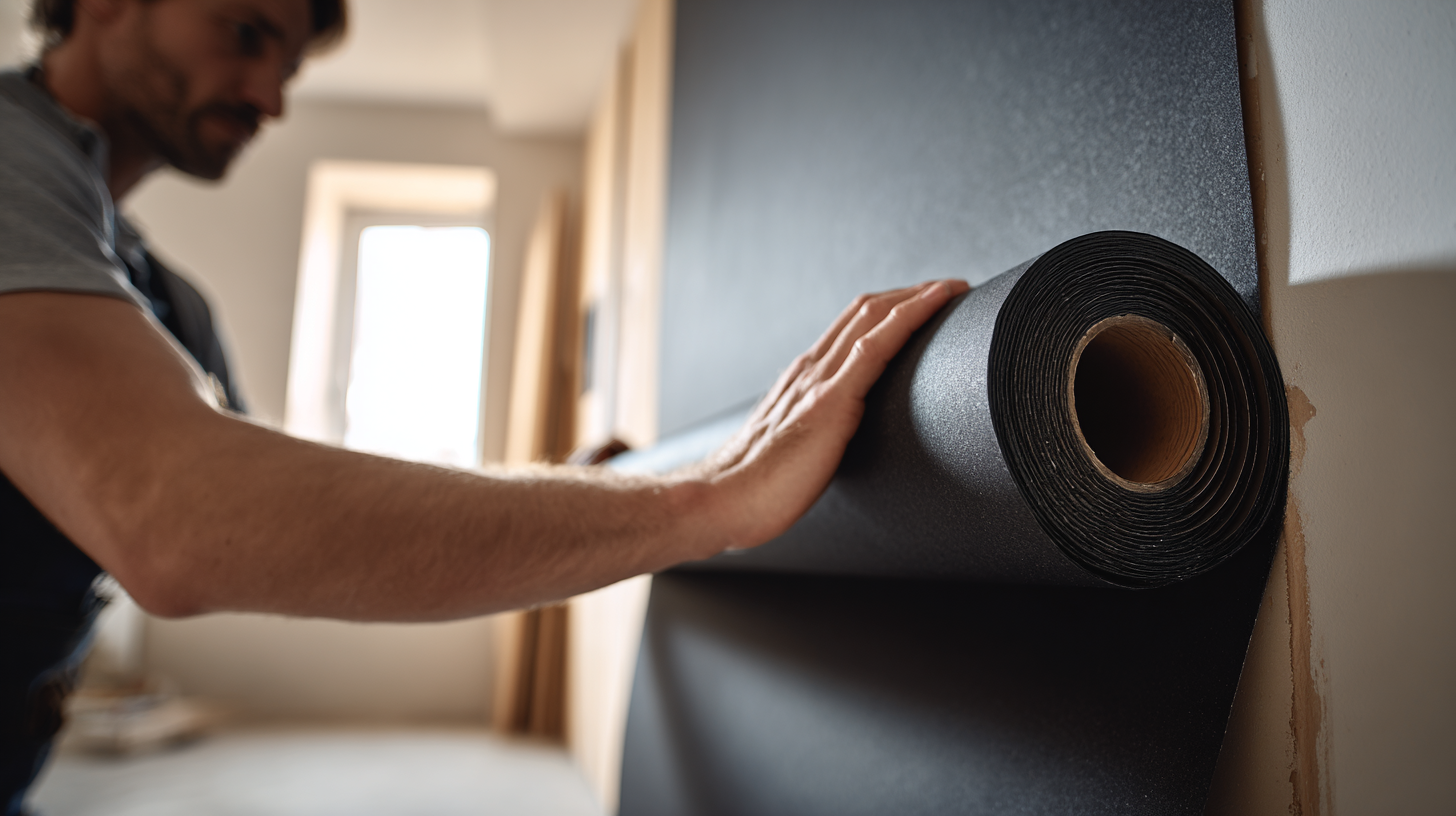
Step 2 - Unroll the Vinyl and Let It Relax
MLV curls tightly when new. Allow it to relax for an hour or two. This makes installation far easier because the sheet naturally flattens. Cut pieces to match the floor dimensions, ensuring each piece aligns cleanly with the walls.
Step 3 - Tape or Seal the Seams for a Continuous Barrier
Once the sheets are positioned, seal the seams with acoustic tape or acoustic caulk. Floors often experience more subtle vibration movement than walls, so sealing prevents sound energy from slipping between the joints. Smooth out any bubbles or raised spots. The flatter the surface, the better your final flooring layer will sit on top. Don`t skip this step because even a small gap can let impact noise travel into the structure.
Step 4 - Install the Flooring Over the MLV
After sealing, you can install carpet, engineered hardwood, laminate or vinyl flooring. Floating floors work especially well with mass-loaded vinyl because they add separation between the subfloor and the walking surface. If you`re installing tile, place a cement board on top of the MLV first to create a solid substrate. Once the final flooring is in place, walk around the room and check for any hollow sounds. Properly installed MLV will give the floor a noticeably more solid and muted feel.
Step 5 - Address High-Traffic Areas
If you have heavy foot traffic or high-impact areas, consider adding an additional damping layer such as acoustic underlayment or rubber matting over the MLV. This combination absorbs both airborne noise and vibration. Customers often do this in home gyms, music rooms and upstairs hallways. The payoff is tremendous because the soundproofing becomes multi-directional and more resilient under stress.
Installing mass-loaded vinyl under flooring provides an immediate sense of quietness. Footsteps soften. Furniture movement becomes less noticeable. The overall room feels calmer, which is exactly what you want when you`re trying to isolate noise in multi-level homes.
How to Install Mass-Loaded Vinyl on a Fence
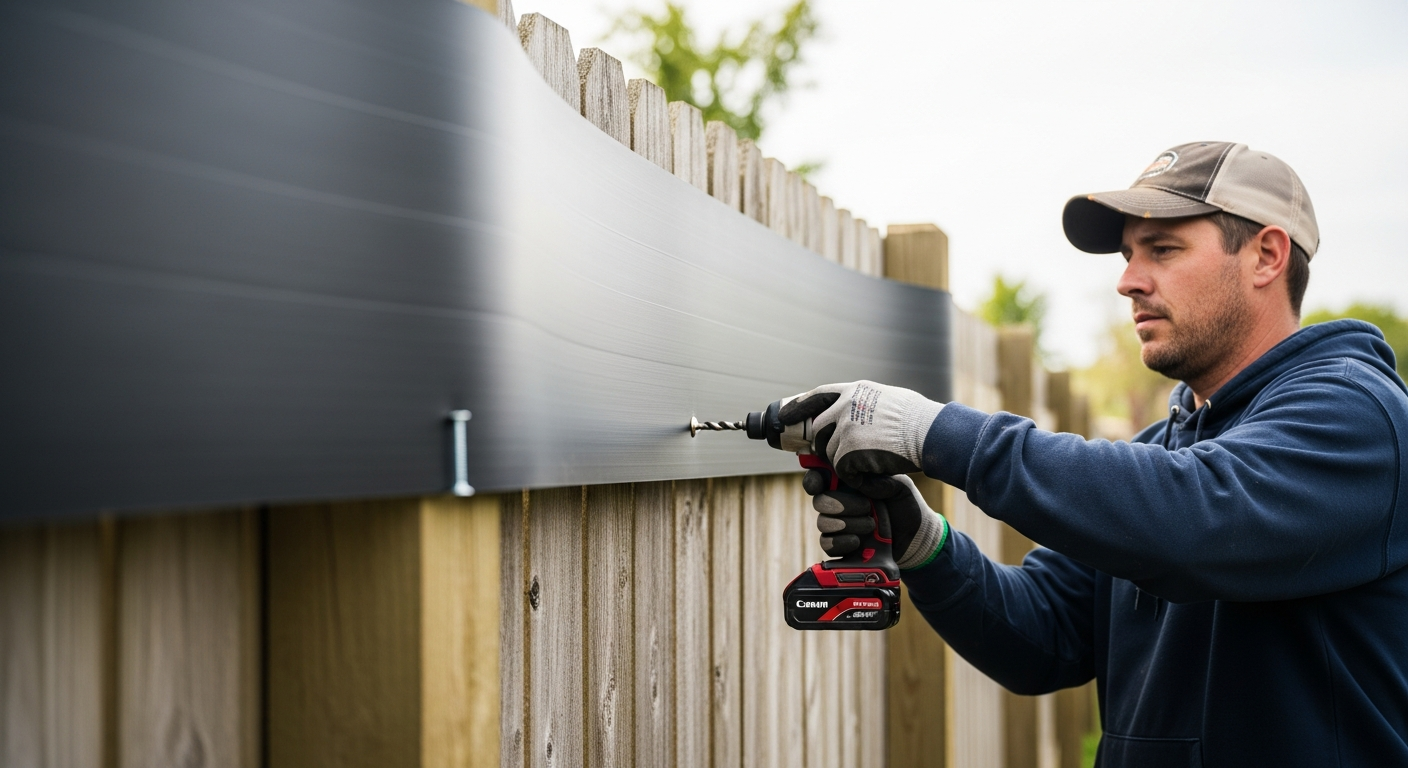
Soundproofing an outdoor fence with MLV is a completely different experience from working indoors. You`re battling wind, moisture, temperature changes and uneven surfaces. Even so, mass-loaded vinyl performs incredibly well outdoors when you install it correctly. Many of our customers choose this option to reduce noise from nearby roads, loud neighbors or busy commercial areas. It`s one of the most cost-effective ways to add mass to a fence without replacing the entire structure.
Step 1 - Inspect and Reinforce the Fence
Before attaching anything, make sure the fence is sturdy enough to handle the added weight. Mass-loaded vinyl is heavy, and fences that are thin, rotten, or loosely anchored may need reinforcement. Replace any damaged pickets or rails. A strong foundation ensures the MLV will remain secure in wind and rain.
Step 2 - Measure and Cut the Vinyl
Outdoor installations rarely involve perfect rectangles. Fences often have uneven edges, varying heights or decorative tops. Start by measuring the largest rectangular sections. Cut the vinyl on the ground using a straightedge and a sharp utility knife. Gloves are critical outdoors because the material becomes more rigid in cooler temperatures.
Step 3 - Attach the Vinyl with Heavy-Duty Fasteners
Hold the MLV against the fence and begin attaching it using exterior-grade screws with large washers or roofing nails with caps. Start from the top and work downward. Space fasteners evenly to prevent sagging. If you`re working with chain-link fences, use zip ties rated for UV exposure. The goal is to create a tight, continuous barrier so the vinyl doesn`t flap or bend in the wind.
Step 4 - Seal Seams and Overlaps
Overlap edges by at least one inch. Seal seams with outdoor-grade tape or adhesive designed for vinyl. Water, dust and wind will try to find their way behind the material, so secure every edge carefully. A properly sealed outdoor installation dramatically reduces noise reflection and makes your fence feel more solid.
Step 5 - Add a Finishing Layer for Durability
You can leave the MLV exposed, but many homeowners prefer covering it with a decorative fence panel, bamboo roll, wooden slats or landscaping fabric. This protects the vinyl from UV rays and weather, and it improves the overall appearance. The dual-layer system also increases sound reduction, giving you better results than MLV alone.
Outdoor soundproofing has its own challenges, yet the noise reduction from a properly installed MLV fence can feel life-changing. The constant hum of traffic softens. Loud bursts of sound become muted. Your yard feels more private, more peaceful and far more enjoyable.
Combining MLV with Acoustic Panels for Best Results
Mass-loaded vinyl delivers fantastic noise-blocking performance, but adding acoustic panels creates a powerful one-two punch. MLV stops sound from passing through the structure, while acoustic panels reduce echo and reflections inside the room. Think of MLV as the muscle and acoustic panels as the fine-tuning.
When you install MLV behind drywall, you`re addressing the transmission of noise. That is essential, but the sound inside the room still needs to be controlled. Hard walls reflect sound waves, which causes echoes, muddiness and a sense of restlessness in the space. Acoustic panels from Sound Pro Solutions absorb these reflections and make rooms feel calmer, clearer and more comfortable.
Placement matters. After finishing your MLV installation, consider adding acoustic panels at ear level on opposing walls. If the room is used for recording or podcasting, treat the first reflection points and add a few panels across the back wall. For home theaters, place panels near the front speakers and behind the seating area. The combination transforms harsh acoustics into warm, balanced sound.
In commercial spaces or offices, a blend of MLV and strategic panel placement dramatically improves speech clarity. Meetings become easier to follow. Calls feel more private. Loud equipment becomes less disruptive. Sound Pro Solutions customers often start with only MLV but quickly realize the value of finishing the project with aesthetic, color-matched acoustic panels.
The end result is the same, no matter the room. Mass-loaded vinyl blocks what shouldn`t enter or leave the space, and acoustic panels shape what happens inside it. Together they create environments that look refined and feel noticeably quieter.
Recent posts


