Building a box is easy. Making it sound good is a completely different project. Most DIY vocal booths fail not because the walls are weak, but because nobody treated the inside. You end up with a hollow, boxy tone that no microphone or plugin can rescue. A space that technically blocks noise but sounds worse than recording in your living room with the windows closed. The frustration is real. You spent a weekend building, and the first recording sounds like it was made inside a trash can. If you're researching how to build a soundproof booth, this guide focuses on what actually determines your recording quality: what goes inside the walls, not the walls themselves.
Acoustic Treatment
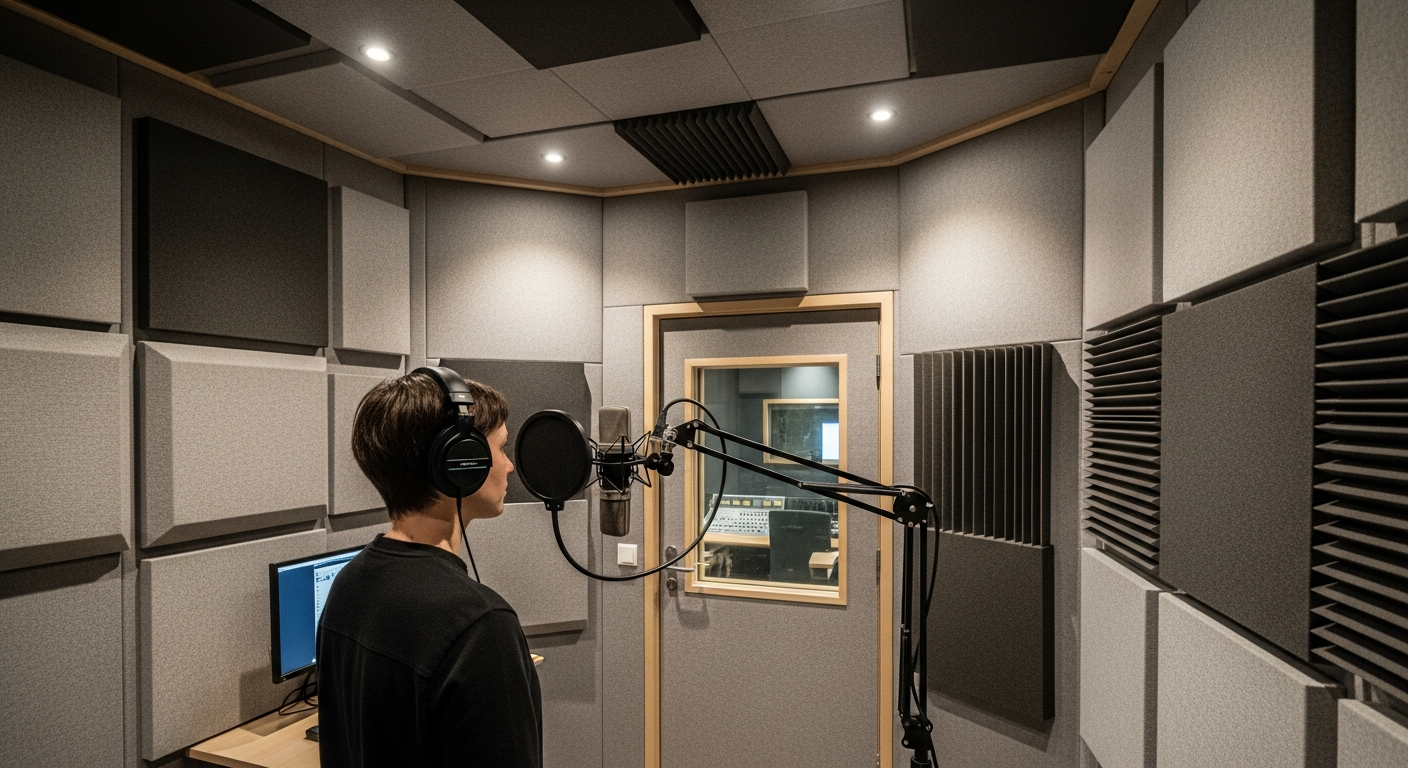
Walls keep the world out. They don't shape your sound. Walk into any untreated enclosure, clap once, and listen. That harsh metallic ring is exactly what your microphone will pick up on every take.
Soundproofing and acoustic treatment are not the same thing. Soundproofing blocks external noise through mass, decoupling, and airtight sealing. That's the shell. Acoustic treatment controls how sound behaves inside the space. Panels absorb reflections. Bass traps tame low-end buildup. Ceiling clouds kill overhead flutter. You need both layers working together. Confusing the two is the single most costly mistake in recording studio booth design. You can build the heaviest walls in the world and still end up with recordings that sound like they were made in a bathroom.
Small enclosures amplify every acoustic flaw. Parallel walls just a few feet apart create a flutter echo, that rapid stuttering reflection you hear when you snap your fingers in a stairwell. Bass frequencies pile up in corners with nowhere to dissipate. The smaller the space, the more aggressively these issues compound. Standing waves between parallel surfaces create an uneven frequency response that colors every recording. Understanding how to build a vocal booth means solving these interior problems before you ever hit record.
Our guide on What Is Soundproofing covers these principles in detail.
3 Ways to Build the Shell
Three approaches. Your choice depends on budget, space, and isolation needs.
PVC frame and acoustic blankets
Fastest and cheapest. A freestanding PVC frame with heavy sound blankets on all sides gives you a functional space in an afternoon. Best for podcasting and voice-over in a quiet room. Portable and easy to disassemble.
Wood frame with insulation and drywall.
Where home studios get serious. Stud walls filled with mineral wool, sheathed in drywall. Add Green Glue between two layers of drywall for a real isolation jump. Mass Loaded Vinyl on the studs before the first layer adds even more density. This approach creates a vocal booth soundproof enough for clean home recording. The cost-to-performance ratio makes it the most popular choice among independent producers and voice actors.
Room-within-a-room
Maximum isolation for professional-grade results. The inner structure floats independently from the outer one. Resilmount isolation clips decouple drywall from framing so vibrations can't bridge the gap. A floating floor sits on rubber pads, completely separated from the subfloor beneath. Double drywall with Green Glue on every surface. This approach stops traffic rumble, HVAC hum, and neighbor conversations completely. It costs significantly more and takes considerably longer, but when silence is non-negotiable, nothing else competes.
Regardless of which shell you choose, building a recording booth that sounds professional requires the same interior treatment. The walls keep noise out. The panels you place inside determine the quality of every recording you make. A $500 booth with great acoustic treatment will outperform a $5,000 booth with bare walls every single time. That's what the next section covers.
Which Acoustic Panels to Use Inside Your Booth
Not all panels do the same job. Choosing the right type for each surface is the difference between a booth that sounds flat and natural and one that sounds muffled or uneven. Good sound booth design starts with understanding what each panel type brings to the space.
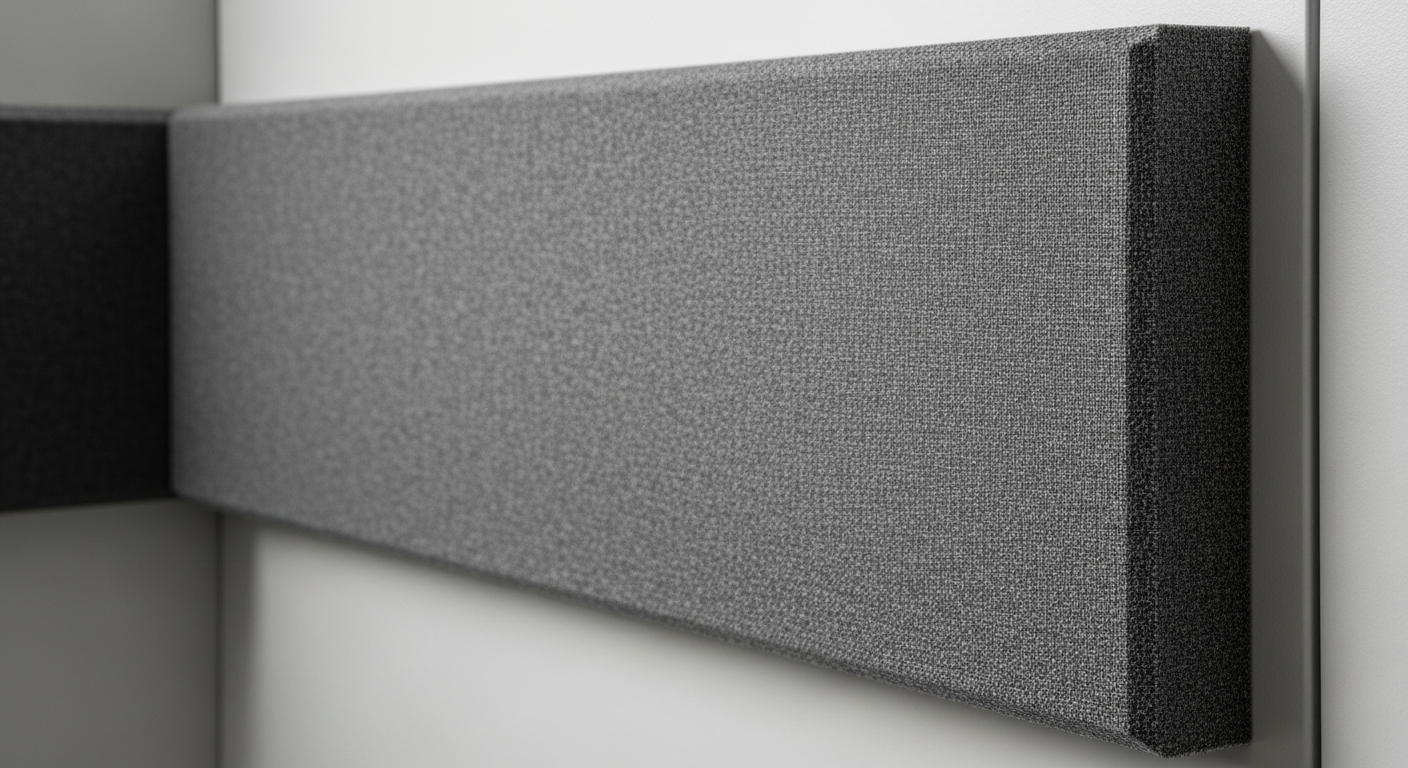
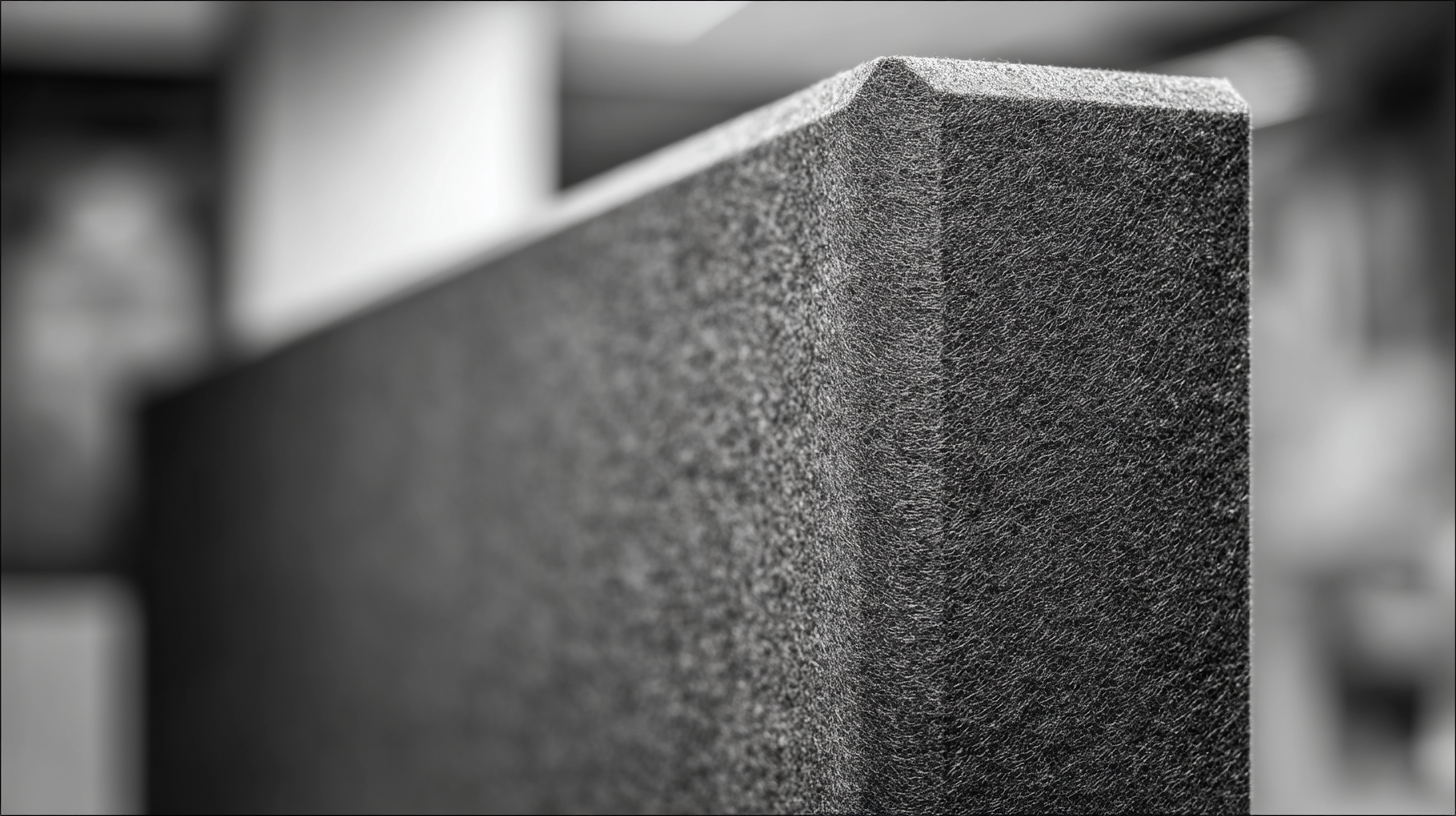
Fabric-wrapped fiberglass panels are the foundation. Two-inch thickness handles mid and high frequencies on walls. Four-inch panels go in corners where bass accumulates. Frameless versions hung on chains make ideal ceiling clouds, and panels with inner frames handle the inevitable bumps in tight spaces.
Wood acoustic panels work when the booth is on camera. Streamers and video podcasters need a space that looks professional. Wood slat designs absorb sound through gaps between slats while adding warmth that foam never achieves. Specialty shapes like hexagons and triangles break up parallel surfaces and scatter reflections. Mounted as a ceiling cluster, they kill the flutter echo that rectangular panels sometimes miss.
Coverage: 60 to 80 percent of walls and ceiling. Not 100. A dead room sounds unnatural. Leave some surfaces bare. Anyone learning how to make a soundproof booth that actually sounds good needs to resist the urge to cover every square inch.
Placement Guide — Where to Put Panels for Best Results
Choosing the right panels is half the equation. Putting them in the right spots is the other half. Four zones matter most.
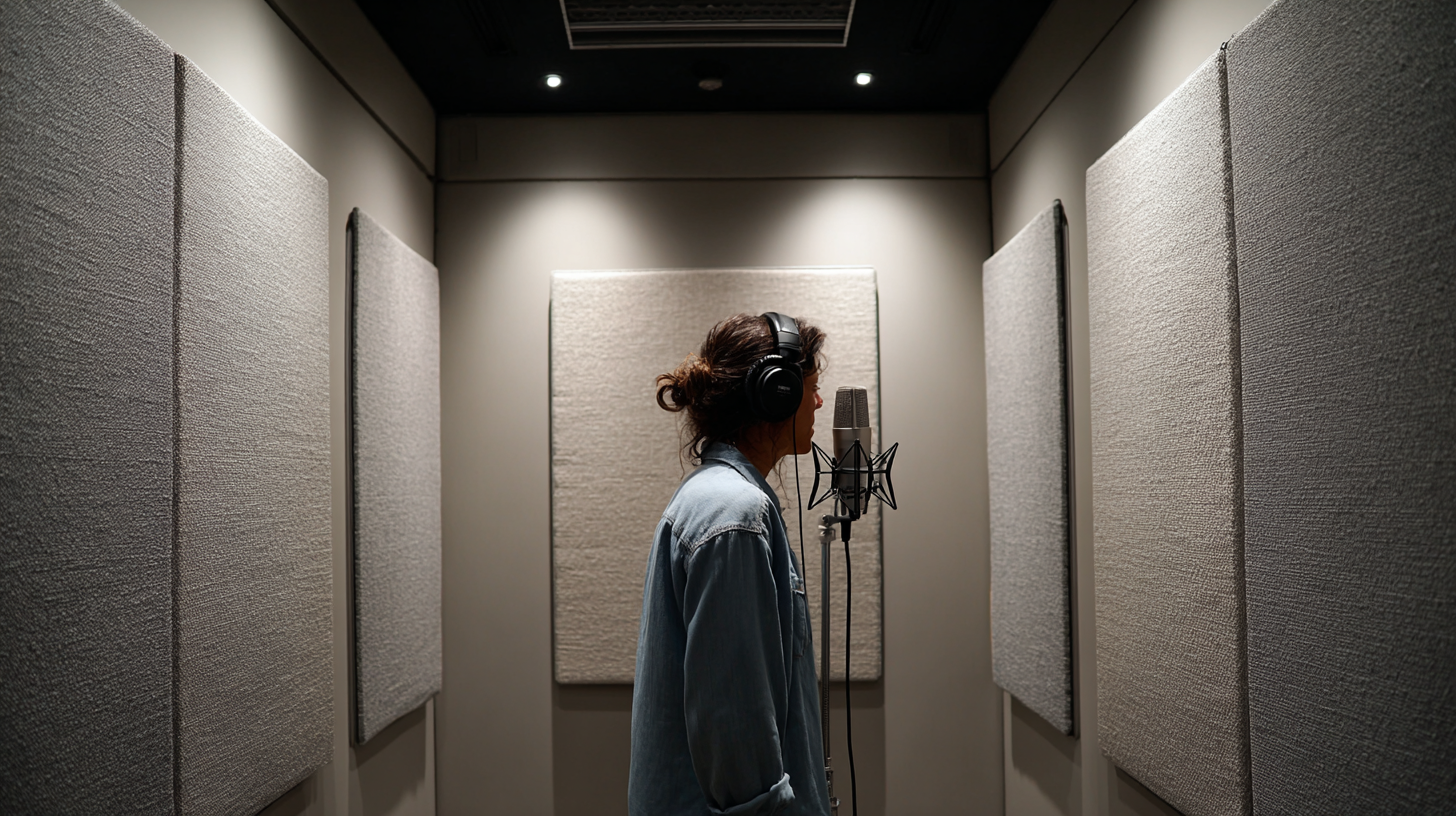
Back wall. The surface directly opposite where you stand or sit while recording. Cover it fully. This wall catches the strongest direct reflections from your voice and sends them straight back into the microphone. Two-inch fiberglass panels edge to edge, no gaps.
Side walls. Panels at mouth and microphone height, covering 50 to 70 percent of the surface. These intercept first reflections before they can bounce between parallel walls and create flutter. Stagger the placement slightly rather than creating a perfect mirror on both sides.
Ceiling. The most forgotten and most important surface. A frameless panel cloud hung two inches below the ceiling directly above the recording position absorbs overhead reflections that add a harsh, brittle quality to vocals. If you treat only one surface beyond the back wall, make it this one.
Corners. Four-inch panels mounted diagonally across each corner with an air gap behind them. This is where bass energy collects in small rooms, creating that chest-heavy, boomy quality around 150 to 350 Hz. Corner treatment is the single fastest way to clean up low-end muddiness.
Add a thick rug or carpet on the floor. Hard floors bounce sound upward into the microphone and undo half your wall treatment.
Seal Every Gap Or Your Panels Won't Matter
Panels control sound inside the booth. But if the shell leaks, outside noise still gets in. A 1 percent gap in surface area can cost you up to 50 percent of your isolation.
Door seals around the full perimeter close the biggest weak point. An automatic door bottom drops a neoprene seal against the threshold every time the door closes. No light visible under the door means no sound getting through.
Acoustic caulk goes on every seam, joint, and cable pass-through. Anywhere two materials meet is a potential leak. Green Glue between drywall layers handles vibration. Caulk handles air gaps. You need both.
Start with the Right Materials
The shell is one weekend of work. The acoustic treatment inside is what separates a good booth from a frustrating one. It doesn't have to be expensive. It has to be intentional.
Start with the basics: fiberglass panels on the walls, thick panels in the corners for bass, a frameless cloud on the ceiling, and a proper door seal. That kit alone transforms the sound from the very first recording. Sound Pro Solutions carries every component mentioned in this guide. Browse the full product catalog or call +1-888-661-7233 for help choosing the right setup for your space.
Recent posts


