Noise problems in modern buildings aren't just annoying — they affect focus, comfort, and even health. Whether you're designing a quiet office, a clear-sounding conference room, or a more peaceful home, ceiling-mounted acoustic panels are one of the most effective ways to control sound. This guide breaks down the entire process of installing acoustic panels on ceilings, with detailed methods for both direct mount and suspended systems.
Understanding Acoustic Cloud Panels and Ceiling Options
Before grabbing your tools, it's essential to understand the various acoustic panel configurations available and how they function within a ceiling setup.
What Are Acoustic Cloud Panels
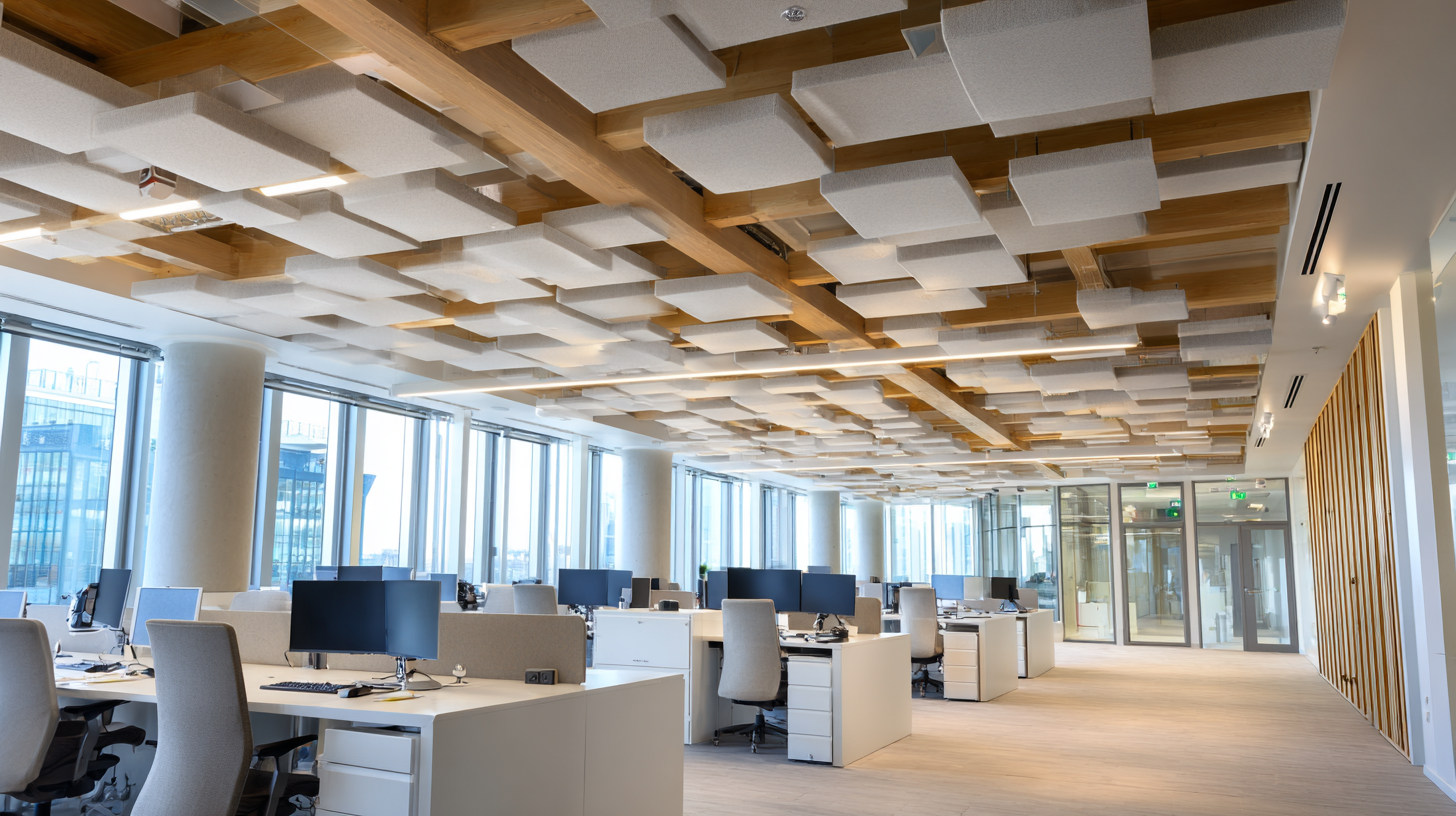
Acoustic cloud panels are sound-absorbing panels suspended horizontally from the ceiling, typically with a gap between the panel and the ceiling surface. This "cloud" formation increases surface area for sound absorption and adds an architectural design element. They're popular in open offices, schools, studios, and restaurants where echo control and style matter.
Unlike wall panels, these are designed specifically for ceiling environments where sound reflections tend to bounce uncontrolled, creating a noisy, unclear atmosphere.
Acoustic Cloud Ceiling Design Benefits
A well-executed acoustic cloud ceiling doesn't just improve acoustics — it adds value across the board. First, it enhances speech intelligibility by reducing reverberation. Second, it provides an energy-saving benefit by allowing HVAC systems to work more efficiently (thanks to improved air circulation around the clouds). And finally, these panels offer a clean, modern aesthetic that fits with most commercial and residential interiors.
You can choose from a wide range of finishes, shapes, and edge details to match your design intent while meeting performance goals.
Suspended vs Direct Mount Cloud Systems
There are two main ways to install panels on the ceiling: suspended clouds and direct mount systems. Suspended panels hang below the ceiling on wires or cables, creating a floating effect. Direct-mount panels are fixed directly to the ceiling surface, with no gap.
Suspended setups are ideal when you want maximum acoustic performance and visual impact. Direct-mount systems work well in spaces with low ceilings or when you're going for a discreet look.
Choosing Between Cloud and Traditional Panels
Cloud panels are the best choice for rooms with high ceilings or open layouts where traditional wall-mounted panels aren't enough. They intercept sound waves before they bounce off the ceiling, making them more efficient in open-plan spaces.
Traditional panels still have a place, especially in smaller rooms, but they don't address ceiling reflections, which are a major contributor to echo and noise buildup. If you're planning a high-performance acoustic environment, it's worth incorporating both types where needed.
How to Hang Acoustic Panels Safely and Securely
Working overhead brings added complexity and risk. Before starting your ceiling panel installation, it's essential to have a safety-first mindset and follow best practices.
Locating Ceiling Joists and Support Points
Ceiling joists are your best friend when mounting anything overhead. Use a stud finder to locate them and mark each location. For suspended installations, ceiling anchors rated for the panel weight are required if joists aren't accessible. Never assume drywall alone can support a heavy acoustic panel.
Solid anchoring ensures long-term durability and eliminates the risk of panels sagging or falling.
Weight Distribution Considerations
Acoustic panels may appear light, but depending on the material and size, some can weigh up to 15–20 lbs or more. Always distribute the weight across multiple anchor points, especially with large or multi-panel clouds.
Even for acoustic cloud ceiling designs that appear minimal, structural planning is critical. Using too few mounts or placing them incorrectly can lead to uneven panels or unsafe conditions.
Safety Protocols for Overhead Work
When working overhead, proper protection and positioning are non-negotiable. Wear eye protection to shield against debris and dust from drilling. Gloves may also enhance grip and comfort, particularly when working with fiberglass or mineral wool-based panels.
Never stretch or overreach while working at height — reposition instead. Overhead work should always be done with a second person on site for added safety and efficiency.
Using Proper Ladder and Scaffolding Techniques
Use a ladder rated for the job, and make sure it's positioned on a flat, stable surface. For larger installs or high ceilings, consider mobile scaffolding — it provides better access and reduces fatigue from climbing up and down.
Don't skip this part. Good setup makes everything easier, from aligning mounts to fastening hardware accurately.
Essential Tools and Materials for Ceiling Installation
When it comes to installing acoustic panels on your ceiling, having the right tools and materials at your disposal is essential to ensuring a smooth and successful installation process. From safety gear to mounting hardware, each item plays a crucial role in achieving the best results. Below is a list of essential tools and materials you'll need to complete the job effectively and safely.
|
Tool/Material |
Purpose |
|
Safety equipment |
Safety glasses, gloves, hard hat |
|
Mounting hardware |
Ceiling anchors/hooks, screws/bolts, suspension cables/rods |
|
Measuring tools |
Tape measure, laser level, pencil/chalk |
|
Installation hardware |
Brackets, screws, suspension cables/rods, anchors |
Direct Mount Ceiling Panel Installation Method
Direct mounting is straightforward but requires accuracy and preparation. It's the preferred method when working with standard ceiling heights or when you want a low-profile look.
Marking Panel Placement on the Ceiling
Start by measuring your ceiling and marking where each panel will go. Use a chalk line to create clean grid lines. This helps you visualize the layout and ensure even spacing. Be sure to mark the center points of each panel location for drilling accuracy.
Take into account lighting fixtures, HVAC vents, and sprinklers — you don't want panels blocking or crowding essential components.
Drilling and Fastener Installation
Once your layout is marked, use a drill with the correct bit for your ceiling type. For wood joists, pre-drill pilot holes and use wood screws or lag bolts. For drywall or concrete, use appropriate anchors or toggles.
It's critical to drill straight and clean to avoid anchor failure. Use a depth stop or painter's tape on your drill bit to ensure consistent hole depth.
Mounting Brackets and Hardware Setup
If your panels use Z-clips, angle brackets, or keyhole plates, install the hardware on the ceiling first. Use your laser level to ensure everything is aligned perfectly — a slight misalignment can cause panels to look crooked or uneven gaps.
Mounting hardware should feel solid when tested. If anything moves under pressure, reinforce the anchoring or replace it with stronger hardware.
Securing Panels to the Ceiling Surface
Lift the panel carefully and align it with the mounting points. Depending on the weight and size, this may require two people. Once positioned, secure the panel in place using your chosen hardware.
If using adhesive as part of the install (like construction-grade acoustic glue), always pair it with mechanical fasteners for safety. Never rely on glue alone for ceiling installations.
After installation, do a visual inspection for gaps, sagging, or loose edges. Everything should be tight, even, and flush to the ceiling surface.
Suspended Acoustic Cloud Installation Process
Suspended cloud systems bring more acoustic control and visual appeal but require a more detailed setup. They are ideal for larger, open spaces with high ceilings.
Installing Suspension Hardware
Begin by marking your suspension points. You'll typically need four per panel for stability, placed symmetrically. Install ceiling anchors or eye bolts at each point. These need to be rated for at least twice the panel weight as a safety margin.
Use a laser to double-check alignment across multiple panels. Even a small offset can ruin the visual symmetry of a cloud ceiling.
Setting Up Wire and Cable Systems
Thread your suspension wires, aircraft cables, or chains through the panel's built-in grommets or mounting plates. Secure them with cable locks or turnbuckles for fine-tuning.
Always follow the manufacturer's guidelines for cable tension and spacing. Panels should hang level and should not sway excessively. If they move more than a few inches with light airflow, tighten or add stabilizing wires.
Adjusting Panel Height and Alignment
Fine-tuning is where cloud systems go from "functional" to "professional." Use adjustable cable grippers or turnbuckles to raise or lower each corner. The goal is to achieve a level panel with consistent spacing between the clouds and the ceiling.
Step back and assess from several angles. Adjust for visual balance and uniform alignment, especially when creating multiple layers or geometric patterns.
This is one of the most noticeable aspects of acoustic cloud ceiling installs, so take the time to get it perfect.
Creating Professional Cloud Configurations
Want to take your ceiling game further? Combine panels into clustered arrays or layered drop levels for added diffusion and depth. Popular configurations include:
- Rectangular grids
- Staggered floating rows
- Multi-height pyramids
- Geometric groupings (hex, triangle, etc.)
These layouts can enhance both the acoustic performance and the architectural statement of the space.
Just make sure to account for HVAC flow, fire suppression clearance, and lighting access when planning complex cloud designs.
Whether you're building out a modern workspace or upgrading a loud common area, ceiling-mounted panels are one of the smartest acoustic investments you can make. Understanding how to hang acoustic panels the right way isn't just about better sound — it's about creating spaces people want to spend time in.
If you're unsure which method is right for your space or need help sourcing materials, our team at Sound Pro Solutions is here to support every step, from planning to installation.
Ready to get started? Browse our full line of acoustic products and mounting solutions.
Recent posts


