Installing acoustic panels on walls is one of the most effective ways to reduce echo, manage reverberation, and improve sound clarity in a room. Whether you're working with a home office, recording studio, conference room, or media space, proper installation matters as much as the panels themselves.
Sound Pro Solutions has helped thousands of clients select and install the right acoustic treatment. In this guide, we'll explain the key steps and considerations for successful acoustic panel installation.
Understanding Acoustic Panel Requirements
Before installing, it's essential to understand what distinguishes different acoustic panels. The right panel for your space depends on your goals—whether you want to absorb sound, control reflections, or reduce flutter echo.
Acoustic panels vary by type. Some are frameless, while others include an internal wooden frame for stability. Panels may be wrapped in fabric, made of PET felt, or constructed with wooden diffusers. Each design impacts how sound interacts with the surface.
A key performance metric is the Noise Reduction Coefficient (NRC). This number tells you how much sound a panel absorbs. An NRC of 0.8 means it absorbs 80% of the sound that hits it. Panels with an NRC between 0.7 and 1.0 are highly effective for general use.
Panel thickness and size also affect acoustic behavior. Thinner panels (1–2 inches) are ideal for high- and mid-frequency control. Thinner panels (2–4 inches) offer better low-frequency absorption. Larger panels cover more surface area, which often improves performance without requiring more individual units.
Finally, look at the material composition. Mineral wool and fiberglass cores absorb sound efficiently and maintain shape over time. Foam is lightweight but less effective at low frequencies. Recycled PET felt panels are durable, lightweight, and eco-friendly—great for open-plan offices or creative spaces.
Pre-Installation Planning
Effective acoustic panel installation starts with good planning. Begin by evaluating your room's current acoustic condition. Use a clap test to identify echo, or a smartphone SPL meter app to detect areas with excessive reverberation. Look for parallel walls, hard surfaces, and ceiling height—all of which affect sound behavior.
Next, calculate how much coverage you need. For basic echo control, a good rule of thumb is to cover 15–25% of the total wall surface. For more controlled environments like studios or home theaters, aim for 30–50%.
Once you know how many panels you need, it's time to decide where to place them. Strategic placement is far more effective than randomly covering surfaces. Focus on:
- First reflection points (use a mirror test to locate them)
- Wall space behind and beside speakers or workstations
- Large flat surfaces where sound may bounce repeatedly
Once placement is mapped, determine your installation pattern. Symmetrical layouts look clean and balanced, especially in visible spaces like offices or meeting rooms. For artistic setups, mix shapes and sizes for a modern, design-forward look.
Before you begin, gather your required tools and materials. Depending on the mounting method, you may need:
- Level and measuring tape
- Pencil or painter's tape for marking
- Screws or anchors
- Adhesive (if using glue-based method)
- Drill and driver
- Safety gear (gloves, eye protection)
Being prepared saves time and helps avoid mistakes when it's time to mount the panels.
Surface Preparation
Now that you've planned the layout, it's time to prep the wall. Start by inspecting the surface. Make sure it's dry, free of dust, and not flaking. Adhesives won't stick properly to dirty or loose surfaces, and hardware may loosen on damaged drywall.
Clean the area with a damp cloth and allow it to dry fully. A light wipe is enough for painted drywall. You may need to sand lightly or patch holes on textured or older surfaces to get a flat, even surface.
Next, address wall irregularities. If your wall is warped, bowed, or has deep texture, consider using standoff mounts or acoustic spacers to ensure even panel contact. Flat panels won't perform well, or look good, if they're half-attached or uneven.
If you have existing wall fixtures like outlets, thermostats, or artwork, plan around them. Either cut panels to fit or shift your layout to avoid obstructions. Always keep acoustic integrity in mind when making layout adjustments.
Finally, mark your panel positions clearly. Use a level to draw horizontal and vertical guides, or apply painter's tape outlines for panel edges. This helps maintain consistent spacing and alignment once you start mounting.
Installation Methods Comparison
There are several ways to install wall mounted acoustic panels, and the best option depends on your wall type, panel weight, and whether you need a removable solution.
The three most common methods are:
- Adhesive mounting – Ideal for permanent installs. Use construction adhesive or spray adhesive rated for acoustic panels. It is simple and fast, but it is not removable without damage.
- Mechanical fasteners – Use screws, anchors, or wall clips. More secure, supports heavier panels, and suitable for uneven walls. Slightly more time-consuming but long-lasting.
- Removable mounting systems – Velcro strips, Z-clips, or hanging rails. Great for rental properties or temporary setups. Easy to remove, with little to no wall damage.
Choose based on the wall material. Drywall supports all three methods, though heavier panels may need anchors. Brick or concrete requires masonry fasteners. Use removable systems or adhesive designed for non-porous surfaces for glass or tile.
Each method has trade-offs. Adhesive is clean but final. Fasteners are secure but leave holes. Removable systems are flexible but may limit placement precision.
We always recommend damage-free systems for renters or temporary offices that allow for solid acoustic panel performance.
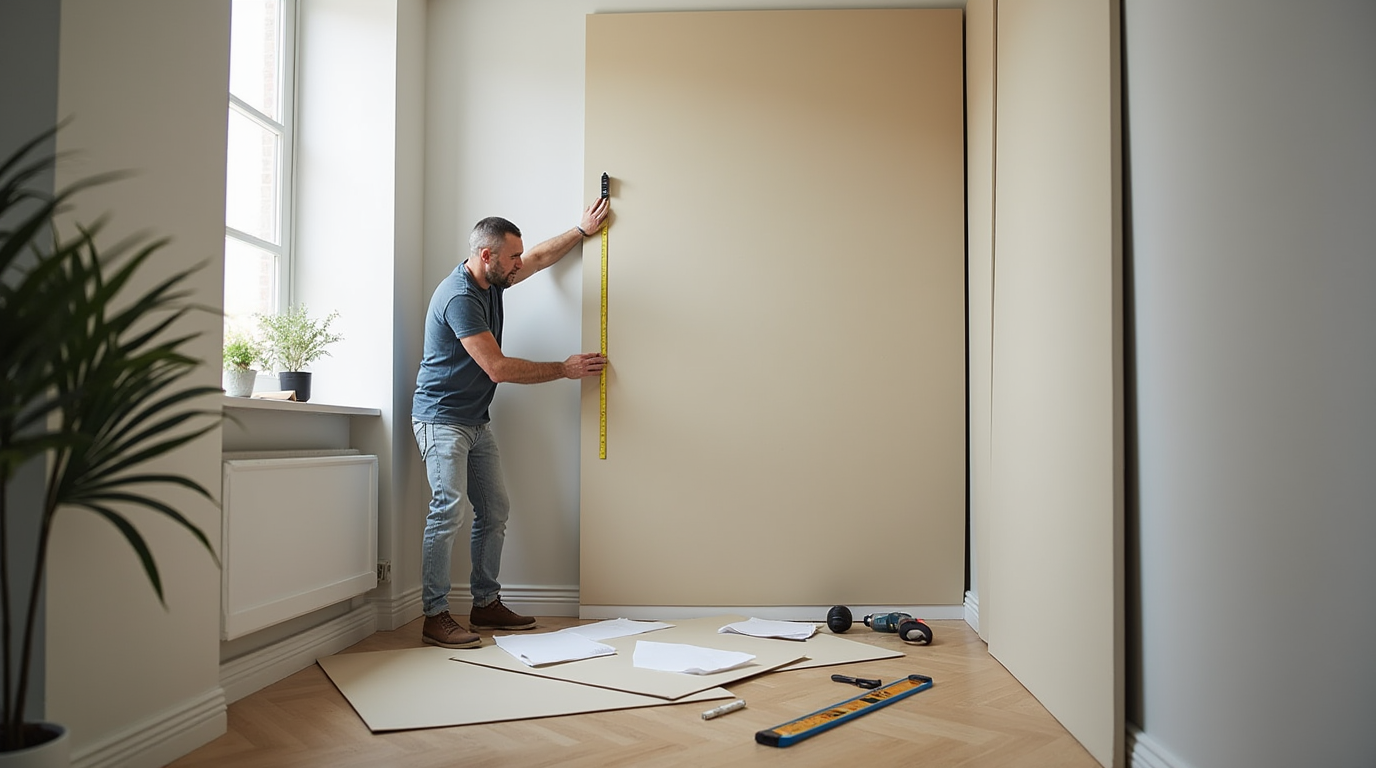
Step-by-Step Installation Process
Once your panels, tools, and layout are ready, it's time to begin the installation. Here's a clear process to follow for clean, professional results.
1. Confirm Panel Placement
Use your guide marks or painter's tape to double-check alignment. It's easier to fix layout issues now than once the panel is mounted.
2. Prepare the Mounting Method
- If using adhesive, apply it to the back edges and center of the panel. Press firmly against the wall and hold for 30–60 seconds.
- For screws or clips, drill pilot holes first. Use a level before tightening fully. Secure both the top and bottom to avoid sagging.
- If using Velcro or Z-clips, attach hardware to the panel first, then align with the marked wall points.
3. Mount the Panel
Work from one side of the room to the other. If you're aiming for symmetry, it's usually best to start with the center or focal point. Check alignment as you go. Use a laser or bubble level for precision.
4. Check Stability
Once a panel is mounted, gently press around the corners to ensure contact. For adhesive panels, avoid touching them again for 24–48 hours to let the bond cure.
5. Repeat and Refine
Install the remaining panels using the same process. Maintain consistent spacing—typically 2 to 4 inches between panels. Step back periodically to ensure the layout stays aligned and visually balanced.
Common Installation Mistakes to Avoid
Even the best acoustic panels won't deliver full performance if installed incorrectly. Here are the most common issues we see—and how to fix them before they become problems.
Skipping Layout Planning
Jumping straight into mounting without a layout plan often leads to poor alignment and inconsistent spacing. This not only looks unprofessional but can leave untreated gaps that reduce the panels' acoustic effectiveness. Always mark panel positions on the wall before installation, using a level for precision.
Using Weak Adhesive
Not all adhesives are created equal. Standard glue or cheap double-sided tape may fail over time, especially with larger or denser panels. Always use adhesives rated for acoustic applications and appropriate for your wall surface. For long-term reliability, opt for construction adhesive or mechanical fasteners.
Ignoring Panel Weight
Heavy panels need proper support. Trying to mount them with light-duty hardware or adhesive alone can lead to sagging or, worse, panels falling off the wall. Use wall anchors or dedicated mounting brackets to secure heavier products safely.
Installing on Uneven Surfaces
Textured, bowed, or damaged walls can create contact problems during installation. Panels mounted on uneven surfaces may not sit flush, reducing their performance and creating visual gaps. Address the wall surface first or use spacers, clips, or flexible mounts to ensure full contact.
Over-Treating One Area
Putting all your panels in one spot may be convenient, but it leads to an acoustically unbalanced room. Sound reflects off untreated surfaces and concentrates where coverage is lacking. Distribute panels evenly around the room, especially near reflection points, for consistent sound control.
Maintenance and Cleaning Tips
Proper care keeps your acoustic panels performing at their best and looking clean and professional. While maintenance is minimal, a few good habits go a long way.
Dust Regularly
Use a vacuum with a soft brush attachment or a lint roller to remove dust from fabric-covered panels. This helps maintain airflow through the material and preserves acoustic performance over time.
Spot Clean When Needed
For light stains or buildup, use a damp cloth with mild detergent. Gently wipe the surface without soaking it. Avoid harsh chemicals, especially on panels made from natural fabrics or PET felt, as they can cause discoloration or degradation.
Check for Loosening
Inspect your panels for sagging or detachment every few months. If you notice a panel starting to pull away from the wall, re-secure it promptly to avoid damage or performance loss.
Protect from Sun Exposure
Direct sunlight can fade fabric panels over time. If your room gets strong natural light, consider using UV-resistant panel coverings or adding shades or curtains to limit exposure.
Recent posts


